Saturday, February 19, 2011

Arizona Build Day At Tom's House!

Tom hosted a build day at his house. It was a bit cold for Arizona weather, a chilly 65 degrees with scatter showers. But it was a lot of fun and Tom's garage is larger than most peoples house. Its huge! I brought as many droids and parts that I could fit in my truck.
Early to arrive in the day was myself and a new builder I met 1vaderfan if I remember right. He's been in the club for a while but just now building his droid. He handled power tools very well and learned like a sponge of anything he don't know yet. He'll make a great droid builder. I'd keep an eye on his build it should be very very nice. His droid is on the the left side of the photo above and next to it is R2-Q5 but I put my R5 dome on him.. His frame is anodized black so it looks must like Q5's skins. 
My goal for the day was easy. Mount the skins on my frame and then see what else I could do to help others or go to work on parts I brought. 1vaderfan got alot done. He got his rockler ring mounted. Then the JAG dome plate on that. Then the aluminum lower R2 ring the HDPE ring on to that and then the inner dome dry fitted. That's quite a bit of work to accomplish in 1 day and now he knows more about R2 dome building than me! Tiny and David are kind and show up to help out the new AZ builders and offer advice on how parts should be made or fabricated.

We seem to have build days 3-4 times a year. If your local to AZ don't miss one of these there lots of fun and you'll learn tons of things. This build was also broadcast on a webcam and we had about 10 viewers watching on and off. I took turns with others chatting with people watching, answering questions and moving the camera on what people were asking to see closeups of.
Now my skins are screwed onto the frame. The alignment isn't perfect and needs to be fixed because of large gaps inbetween part of the skins.. I have a few ideas on how to tighten the gaps. I'll try out some ideas to show you my fix because I know that 100 people have these skins in 2011 alone and will have the same issues arrive infront of them.  But since my 2nd droids is barely 1 month old I think I'm flying thru progress and will keep going forward.
Check out the cracks! I have some bad spacing inbetween the skins I need to tighten. I have so many things to do on these droids I'm not going to stop and pittle around trying to recover 1/16th of an inch right now. I'll get back to this after I think it over many times. Lets keep building.
Like myself and having the same name too. Tom is building 2 droids at once so its pretty hetic. He has the same CommB frame I do on R2-Q5. He is also building a tube framed droid and spent a lot time cutting wood for that droid. I know he got alot of progress done today also.
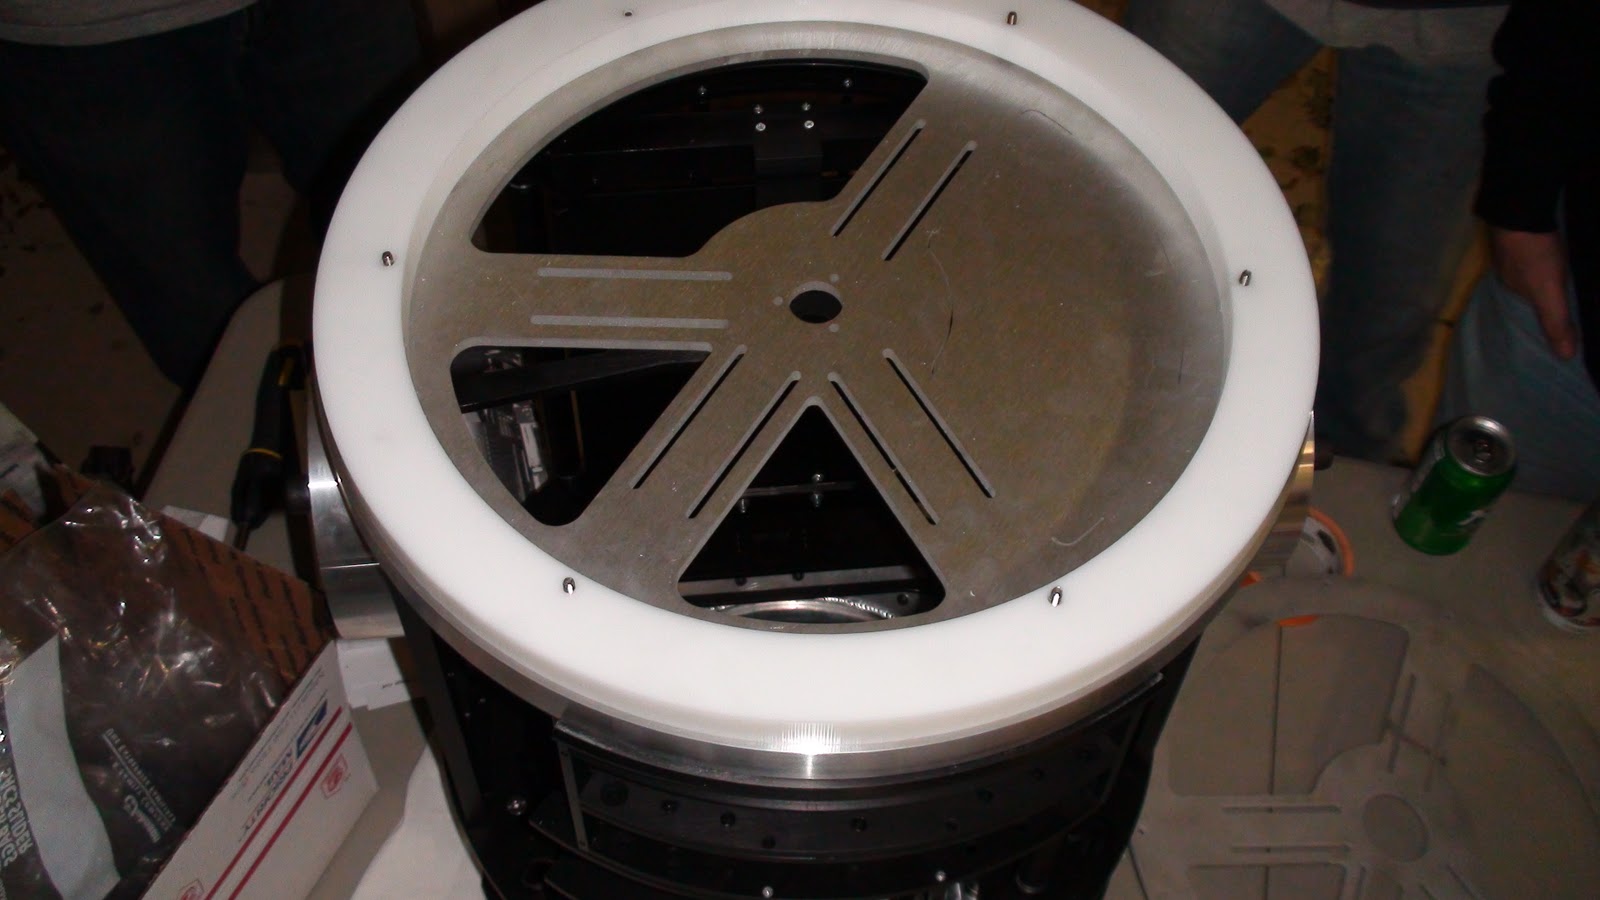
1vaderfan got a lot of work done today and his inner dome put on top of this. Tiny P is like a Mr. Spoke who can see things on droids most people's eye will never look at. I showed Tiny some boosters and those hydros that go in them, he'll tell you if they were built wrong and what you need to do to correct it. Amazing whats in this brain.

Friday, February 18, 2011

Q5 Skin Work Complete!

The paint is dry and all the panels are glued on. I think its looking bad ass. This is day 8 after I took a set of virgin skins and separated them, cleaned them up, painted, taped, glued and JB welded them back together again.
So far so good. This project is coming along much faster than my R5 build. Next project is to add in the coin return, octoport and pocket vent. Tomorrow I'll fasten the front and rear skin onto the frame.
Here is another project I've been working on, these resin or whatever its made out of side pistons. They're made out of the same brittle material I found on ebay. But this is sort of think enuff to be safe to use. Plus I'm gonna paint it black so that will hide some detail or lack there of.
The center piece has a spine of left over material where it the excess comes out of the mold. The rear piece I like a crazy man who should know better than trying this in brittle material, filed it down smooth. Then I put glazing putty over it. Kind of dumb thing to do:

1. Because I'm paint it black.
2. You'll never see it because I'm going to display the other side and this will be hidden from view. If I screwed up it would have shatter part of it and I'm be kicking myself in the butt for doing this.
Now its all painted and finished up and just about ready to install it. I'll put this away and get to work on the next section. With a black droid I get to cheat some and build this much faster than a typical R2-D2 all aluminum build.
Last update tonight. I received these styrene horseshoes from Thomas.These need to be glued together, and sanded and what have you. These will be painted black also, so no need for uber expensive aluminum ones.I have the buttons and bars ready to go on this part. Its cool to watch a droid come together no matter what kind of droid it is.

Wednesday, February 16, 2011

Q5 Shoulder Bars

Here are the painted shoulder bars for R2-Q5. My luck with Don's parts are not good. So far I managed to drop every single one of them, breaking half of them. I dropped one of these bars and broke it in two:(
So then I superglued it back together and it held up for the silver then copper paint job.
The skins are flying together. I have VHB tape on the rear back door now. The roll of tape lasted for two complete droids skins with showing a few feet leftover. I wrecked the paint on the front skins. This is due to super glue getting on the clamps and peeling off tiny sections here and there. Its not very bad though, not as bad at what happened to R5. So the front skins have all the door panels on, minus coin return, power couple, side door and octoport. I just painted it and I have to say it looks really cool. My wife said she likes it more them R5-D4 now. 

The rear skins I just mated the inner and out skins. Fellow builder Tom is hosting a build day on Saturday. So I'll be attaching the skins to the frame @ Tom's house. I can't wait to get photos of this, its really bad ass.

Monday, February 14, 2011

Q5 Skin Work Continues

I placed the 2 skins together and with a felt pen I marked out the line I need to cut out on the inner skins for my Power Coupler to fit in. With my other droid I didn't have to do this.
 After I cut out the hole I drilled holes in the skin and in the Power Couple to fit together. That ended up in FAIL. The brittle PC crumbles after any type of pressure is applied to it. Sad because this was my strongest and thickest masterial. I better plan to dump all of these parts and move on to another type of material.
 
Today I put the 3M double sided transparent VHB tape on the skins. About an hour later I clamped the front inner/outer skins together. Previously I waited 24 hours hoping the tape would stick better to the skin. I found no difference between waiting 1 day or 1 hour when peeling off the backing.
Now the two skins are mated for good in an unnatural holy matrimony for the dark side. I'll let that tape kind of melt/bond all day in the Sun. When I get home I'll take off the the clamps and anywhere the tape don't bond totally and makes a pop sound when you squeeze the skins together. Will get spot super glued and clamped for 15 minutes. I only have 5 big clamps that can do that without wrecking my paint so the process to bond them will take hours. I'll probably wreck the paint and need to fix it up after all the detail pieces are done.

Friday, February 11, 2011

Waiting on paint to dry

I'm waiting on the black paint to dry. I painted everything, both inner and outer skins black semi gloss. There is no 'Victor Franco' paint job going on here. The only dilemma is will I wreck the paint again when I mate the skins? My money is going on probably. 
Time will tell later this week. 

Until then check out the nice contrast of silver utility arms and black death star droid skin just painted.

Thursday, February 10, 2011

Drive System and Skin work on Q5

My new friend Oscar for some reason or another decided to part with this JAG drive system. Brand new and never used! Plus he had NP motors included, already filed down to fit in the battery boxes and drive shaft cut off! Nice. I been waiting for the JAG run to finish on that drive system like 10 months. That should be finished soon then both droids will have drive systems.
They are heavier than I had imagined and very well built and designed. Made out heavy duty steel. A seasoned builder could make a system themself. Except for the custom made gears I think.
It has the omni ball in the back which isn't manufactured anymore. I'll need to make sure I don't drive over tons of asphalt, I think it will screw up that ball a lot. I tried to hook up the wires to my plug in charger that's about 14.4 volt. Wouldn't work. So I ran the motor wires off my R5's battery and they spun just fine.

 I know I just said in this blog I'm tired of doing skins after 4-5 months of this on and off, what yesterday? I did styrene skins and cut it all out painted it and wasn't happy with the results and then did R2/R5's skins. So I might as well get started on Q5s skins since he's naked. Otherwise I"m starting to run out of things I can do at the moment on R5. I need ankles and then I can put R5 on 3 feet and start driving him around. R5 is almost done construction wise. Maybe upgrades to do later but the general build is winding down. 

So its going to get hectic doing 2 droids at once. Bye by virgin skins...
Since this is my second time around doing this I went through it in short order. Since I'm not putting hinges and servos on the door panels I can JB weld the inner skins shut and I'm not cutting out any rear doors. So I can JB weld the rear inner skins shut and save tons of time.

In 2 hours I had all the panels wiggled out or cut out. Then filed the skins and outer panel pieces, primed them and painted the outer skins black.

Then the first thing I did to the skins was drill holes on the inner skin to hold the coin slots. I have those large old school coin slots. So you either cut the coin slot, or the frame, or make your own coin slots.
Here is a photo showing the coin slot just barely hits the top of the frame where the slot is. I believe the David Shaw coin slot would fit in there. I marked were I needed to drill so mine will fit in.  
I drilled some holes to weaken the area then took a pliers and broke that area out. I used a file and made sure I had a tight fit. There are lots of ways to cut that out. Jigsaw or dremel, even a file if you have the time.
A test fit of the freshly painted outer skin. I haven't painted the inner yet because I ran out of paint and I was toying with the Victor Franco paint style. I think if I don't paint the inner skin that will highlight all the small panel details. But its not screen accurate. Truth is you can barely see R2-Q5 in Jedi anyway so I whatever you want to do is okay.

This droid works for evil so it probably should be as black as possible, but I just want what looks the best.
I love this photo. The contrast of the silver and black is cool.

Just a test fit. The paint won't be dry for another day or so. I'll try a few test fits and decide on the Victor or full black paint style in a few days. Its cool to have a new droid and one thats a different color. Its like I just got married all over again with droid building from the start. The dark side is strong in this one.
Today while I was taking the skins apart I wondered if I should even by painting anything? With R5 I prepainted all the parts. As the blog shows I wrecked all of them during assembly and repainted a second time. So am I wasting my time painting this? Hopefully not.
The parts drying on the diving board. Good day to paint around 70 degrees today and will be 80 next week. I always wait 2 full days until I handle parts after paint. Sometimes if you wait 1 day your fingerprints can imprint on the paint. So I won't mate the inner and outer skins until all of its dry and taped up with 3M. There are a couple of copper panels and 1 silver panel in the photo. The center vents are getting a new coat of silver. Then I'll have to paint the inside black. 

The red utility arm is the top crooked one I have for R5 that I never fixed yet. I poored GOOP inside and waiting for it to dry. Then I'll try to drill out a better hole and fix it.

On another good note. I thought I might have blow up part of my JEDI control. After checking everything I got servos working again on it. I spent a couple of hours yesterday writing JEDI code and testing custom programs. So when I don't have parts to deal with I have code to write and check on the droid.

Monday, February 7, 2011

Skins and Side Plates

One of the first R2 parts I got my hands on were these styrene skins. I wasn't sure back then if I'd ever get my hands on some aluminum skins. Today I have three sets of aluminum skins plus the styrene seen below. I wanted to make R2-Q5 out of the AL skins but a couple of weeks ago decided I should use the styrene and paint it black. That will save money and weight. So far after cutting the rear skins and trying to paint them black I'm having no luck. The paint on the skins cracked really bad when I primerd it. Then I sanded it really good and painted it black and had to back off. It was cracking left and right.
I cut out all the areas I wanted to high light on both layers of skins. I'm not going end all be all here. I couldn't get this all painted completely black as it cracked. I'm wondering if thats due to the temperature (70) or the paint. I haven't used this paint very much and not sure how it reacts based on tip.
So this is what the back would look like without the details and complete paint. It looks like crap and its brand new. Bummer!

Here is what it should look like when done and on the Deathstar.

For a droid that will cost north of $3k I want it to look better and more accurate. So the good news is in I have my aluminum sets brand new in the box. However I'm not really in the mood to go back to work on the skins. I've been doing that on his blog for months now! I want to keep building but on to something else. I have some parts coming this week from Oscar that will cheer up my mojo to keep going. I was hoping this styrene skins would go together fast and have something of a R2-Q5 to take to droidcon.
 
I made these side panels over the weekend. The white bracket is on R5 and the copper bracket is on Q5. Funny one of the last parts I made for R5 is the first I made for Q5. I made these parts for only a few bucks.
To hold the sheetmetal on cut a L channel to screw onto the frame. Then glue it the sheetmetal on it. I drilled holes thru the L channel to lighten it and make extra holes to apply glue to adhere to the sheetmetal.

Now that I think about it. As of now I have no plans to open panels on Q5 so I could fly thru the AL skins much faster then this end all be all R5 droid with hinges, and servos. Naw. I'll do that later, maybe this weekend? Plan to take 1 week of vacation to Q5 this droid? Time will tell on this robot blog that's for sure. One day I'll read how I got bored and opened all the panels on Q5 here.