Wednesday, March 9, 2011

Debuilding day :(

We can't all be winning like Charlie Sheen for every winner there has to be a loser. Today I went backwards in my build. Meaning some of the past build days were for nothing.

 First off the good.
I took my other Rockler ring apart and replaced it with Lithium grease. That didn't help the rotation very much. So I polished it with Mothers. The end result is now it gets 2 full rotations per turn. Maybe more but it goes so fast I can only estimate around 2 rotation.
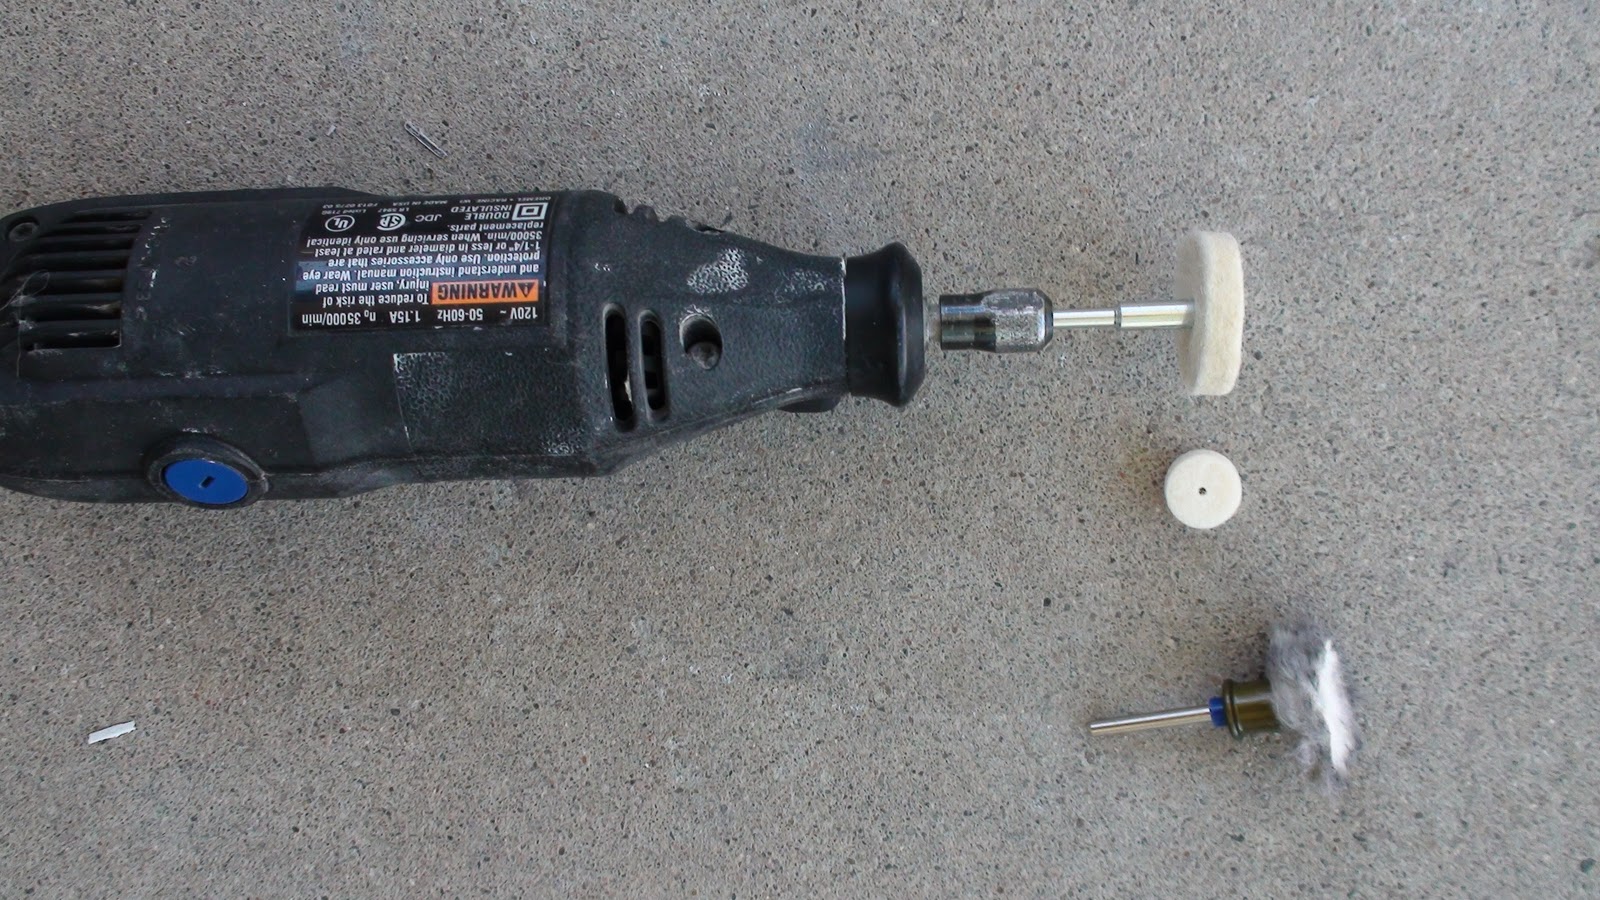
I'm polishing using the disc that's attached to the Dremel. Don't bother using the 2 pictured below it. They're expensive and will be chewed up at a higher rate. You'll get more mileage out of the one I'm using. You'll probably need 4-6 of them per Rockler depending on your experience doing this. Also don't do this all in one shot. Let your Dremel cool down. I'd suggest polishing 1/4 of the ring and let the Dremel cool down.

Now the Fail.
That new adhesive I bought didn't work. I didn't even have to install it and try, just touching it was clear that wasn't going to hold. So I ripped off the strips and started to think. I noticed my rear doors had the JB weld cracking. Too much wear and tear on them. I have purchased 2 Xlarge hinges so I figured what the heck. I'm going to have to take this JB weld off to hinge them.

WARNING: The following images might hurt a fellow droid builders eyes. This is your last chance to close down the blog.


This is something I never thought I'd be doing or taking pictures of. Stabbing my skins with butter knifes. Oh my what have I stooped down to now?

Sometimes I think that his blog is not some instruction manual on how to build droids. Its an instruction manual on what not to do. But seriously I have been thinking about doing this for around a month or more. However I thought I could get away with just using some adhesive for those strips. I decided to take all the rear skins apart and add somethings I didn't know that I'd need to have. More on that in the next couple of blogs.

But it gets worse. Just before this prior to this photo, this happened.
I was using a sanding wheel on the end of this Dremel to eat away the JB weld. The wheel slipped off the skins at one point and hit the shirt under the skins. In microseconds the shirt binded up the Dremel stopping it cold in its tracks. Then what seemed like 'bullet time' kicked in. I knew that if I didn't unplug the power to this Dremel fast 'magic smoke' would come out of it, and/or burn down the house next. First I reached for the Dremels off switch and for some reason  I fat fingered it and failed. Then I just grabbed the power cord and yanked it out of the wall to kill the power.

Too late, smoke was coming out of the Dremels vents. I thought there went 60 bucks, then put it aside and went back to polishing with my other Dremel. The Dremel took maybe a 2 second hit of motor being seized. Then like an idiot, 10 minutes later I said 'That cooled down, I'll use this Dremel to remove the rest of the JB Weld'. Then powered it up for 5 minutes and removed the rest of the JB weld. After I turned it off I noticed a nasty smell I couldn't tell if that was the smell of burnt JB weld or burnt up Dremel. Either way more 'magic smoke' was coming out of the Dremel. I'm going to put it away for a while so it can 'heal'. Maybe it nearly shot, or maybe I can buy some new bushings and repair it.
Now the rear skins are apart and I'm back to where I was a few months ago. However now I know what works and more importantly what don't work. Four months ago I wasn't aware of unknown unknowns that I now know what some of those unknowns are now known now but unknown back then. Now I'll attach the 2 magnets directly onto the inner skin. I'll also mount that strip with screws so it won't come off. The never ending rear door never ends.

So I might of wiped out one of my beloved Dremels but atleast I didn't bleed as much blood as yesterday.

If you have to take your skins apart don't bother sanding the tape or adhesive you used. You can but it won't do that much. I sprayed 2 layers of Goofoff and then use a razor blade and it peeled off like butter. Then I washed it with soap and water and its ready for me to do crazy things to on Thursday and crazy things will be done.
Dans power distribution board version 2.1. I have two of these in R5-D4 and this one will go in R2-Q5 to feed him power. Photo for reference. 12 volt comes in on the left of the board. Then next to it is 5 v, 9v, 9v, 12v, 12v, 12v.
Here is the back side of it. Not too many points to solder. I think I could put these together in around 30 minutes or so.  The 3 open slots you see I believe are on default 12 volt. If you add I think a resistor you can step it down to lower voltage.

Tuesday, March 8, 2011

Foot Drives

A brand new JAG foot drive system arrives! Now I have one of these for each droid. I just have to figure out how to hook them up. I need to save up for a set of NP motors to power this system.

I didn't work too much on the droids today. I put the rockler ring back together and used white lithium grease. I'd say it spins with 2 -3 times better and faster than it did before. When I do my other ring I just replace the grease without polishing to check the difference.
I've added a magnet on the rear skin next to the octoport. Now I'm testing out Loctite Power Grab all purpose construction adhesive to bond the AL to AL. This strip of AL that has magnets has to be attached to the skin with adhesive more powerful than rare earth magnets. I tried this before with superglue and the superglue failed.
On the other side of the skins I'm gluing this painted AL strip with a magnet on it. Tried super glue but it wasn't strong enuff. Now I'm testing a new adhesive that I mentioned above.
Here is how I have this rare Earth magnet attached to the lower rear skin using a 8/32 standoff. The other side of it is held on by a counter sunk bolt.
Here is the other side of it. This thin strip of AL makes a lip for the back door to rest again.This strip is great if it works, it must with stand the force of magnets pulling on it, 3M dual lock tape, plus the force of the back door pushing it in. I wish I had foresight to make this and just have the inner skin screwed to this in some places. Other wise it falls through. I've been messing with this back door forever now.
The magnets in the leg and shoulder hub are now done and installed and this system works. I going to do the same thing in my other droid. Even if your shoulder hub fits tight this is insurance it won't fall out over some bumps.

Monday, March 7, 2011

Magnets again

The JBweld is now dry on the back of my shoulder hubs. Next I attached rare Earth magnets which are seen here as black.
Then you drop your shoulder hub into the leg where you want it to attach.
On the other side of the leg let 2 magnets jump into position and hold the power coupler on.
Then tape them in place so they won't go anywhere.
Now take off those magnets from the back of your shoulder hub and let them position themself over your taped magnets in the back. I then super glued them into place and then JB welded them in. 24 hours later I can remove the tape in the back and insert my shoulder hubs.
On my rear full door I screwed and then taped a hole. I then attached this powerful rare Earth Magnet. I'll work on the other side that this attaches too later this week. 
In this photo if you look below the hole I counter sunk. You can see I just barely hit into the ring. That bumps out the aluminum which clearly will slow down your ring. I noticed of have 2 of these spots I'll need to file down before I polish this.
The other project today was taking apart my rockler and polishing the inside. This is supposed to make them spin better. I'm going to find out.  You untighten the retaining screw and the steel balls will fall out of the hole. Then I washed all the grease off the balls and the ring and bought some lithium grease. I got about 3/4 of the rings polished. I started to run out of polishing disc and called it a day after 5 hours of working on the droids today. I'll finish this project tomorrow. 

I also worked on my rear door skin with some magnets but screwed 1 side up. That will set me back 2 days as I have to cut and paint some parts to replace the ones I wrecked.

Sunday, March 6, 2011

Magnets how do they work?

I didn't do too much work today. I took Q5 apart and JB welded on a side pocket vent on the front skin.

I'm not sure what to do with that warped horseshoe. Maybe I'll take it all apart and start over again.  However this horseshoe in the photo above turned out great. They cost and weigh about 1/3 as much as aluminum. If you want to save money on your 2nd droid this is a cost cutting choice to consider.
I JB welded on magnets on my shoulder hubs. While trying to figure out why my horseshoe was warped the bar few out and shattered into 3 pieces on the ground. Nice!

I'm also done with paint on my booster covers and installed the screws to mount to the legs.
I finally went out and got a truck to haul around these heavy droids. This one has 4 wheels and if I copy Tiny right I'll have a nice transport system soon. I'll need to expand the bottom to make sure it fits the wide feet of an R2, Plus I'll need to make some type of cushion the droid will rest on.

So that's it for today.

Saturday, March 5, 2011

Another build day

Tom hosted another build day at his house. The weather was fantastic this time, as last time it was cold and rained on and off. We got a lot of work done on our droids.

First off I showed him my assembly of the center vents. I couldn't get the lower piece to fit inside the outer rings. Since it won't fit I'll take my time with this part and ask some others for help on how to do this right.
Now I'm working on my R2-D2 dome even though its mounted on my imperial frame and skin. So far I mounted the rockler ring, then the JAG plate, then the lower ring, then the plastic ring on top of that. I drilled out all the holes 2 drill bits up from what the holes came in. This makes it easier to take on and off.
Here are the two droids. Time to take the droid on the left with my 300 MM dome to Tom's and work on it.
So I bust this virgins dome's cherry and start cutting the outer dome panels. First I numbered them all with a marker so I know what belongs where. Its simple insert a hand saw like the one seen and slowly cut the tabs. It took me about 45 minutes to cut them all out.
I have to admit this is fun. Kinda of a once in a lifetime experience, or you have to build another dome, or become like Tiny P and work on a bunch of these. Out of all the parts of this droid I worked on this was hands down one of coolest things.
I then spend the rest of the day filing down the leftover slag on the outer dome. It took good hour or two. Then another good hour or two to file all the slag off the panels you just took out. So here is how the droid looks now with all the outer panels removed to see how the two domes line up. Its not bad. I think I'll have to make cuts to make it fit better. I'll need more help with experts on what to do next. I don't have any HPs or radar eye to finish this so I'm in no rush on this dome.
 Droid back at home with his panels all removed. R5 looks on.
 Now both of my droids are really starting to take on the look.

Thursday, March 3, 2011

Installed the Center Vents

I'm not totally happy with the paint. It seems to be my luck in life. I end up painting everything twice or more. But right now them might the 6 foot rule. They look pretty good 6 feet away or farther.
Speaking of center vents. I received some aluminum center vents from a run Bob did and got them today in the mail. Very nice! I'll need to figure out how to put them together and install 1 set in R5. The other is a backup incase I want to paint them black and put in Q5.

I'm also painting my other horseshoe today so that will be ready to mount on Saturday.

Wednesday, March 2, 2011

Putting R2-Q5 Together

Although this droid isn't done I'm going to put together what's done on him so far and get ready for this weekends build at Tom's house again. The frame's paint has dried and I've put it together. I like this much better than the standard aluminum finish. Especially for an imperial droid.
I gave this droid my own personal touch by putting on the Imperial Symbol inside and out on the electronics panels. I have parts here and there that have the copper paint on them so the inside frame of R2-Q5 matches the paint scheme the outside skins have.
Its painted in a mild gloss finish. A flat paint is too dull and cheap looking. The actual droid from Return of the Jedi from the 2 official photos appear more of a high semi gloss reflecting the Deathstar on the droid. I still have to finish painting the imperial symbol on the other panel. Thing looks pretty cool.
This photo shows how I painted some copper pin stripes around the lower support rods. If you look closely you'll see I also painted the standoffs that hold the electronic panel on copper also. Nearly everything on this droid is getting some type of custom treatment. Its not like many people will ever be able to see this far inside of this droid when its finished. It just shows the extent I'm going through to make my R2-Q5 as real as possible. No amount of detail is spared if you can't can't see it from 3 feet away. Plus Tiny will point out anything I did wrong:)
Initially I was going to paint this red. But after looking at it I figured silver would flow better with what I'm making so aluminum it is. Using magnets to hold the stencil on worked much better than gravity holding it down on my first attempt.
Skins are mounted and legs are mounted with shims and 1 horseshoe I have finished from the flat pack. Looks good except for the skins. I want to eventually make it look better. The JBweld is unsightly for what I'm shooting for.Thus, I might paint the inside skins black. I dunno know yet. I'll worry about that later.
My dream is coming true right before my very eyes. This droid was born just a few months ago and its really coming along.  I'm going to have to break open my 300 MM dome at the rate I'm going. I have work off all next week and every day will be 6 hours of droid building. Next job is mounting the center vents and side pocket vents next week. Also will finish the other horseshoe and paint it. Then mount the shoulder hubs with magnets.
Horseshoe made of styrene, buttons made by Droidwelder, and resin bar I painted silver and copper. I hope to replace that bar with something aluminum, if some kid touches it the superglue will break. Its not screwed in like the buttons are.
I think a week from now I'll be as far as I can go for the moment on R2-Q5 and will have to either start on the dome, or work on the feet next.