Monday, April 25, 2016

Feet Assembly

I had the center food done a while ago and now its time to install it. I didn't want to remove the batteries and start unwiring that so I lay the droid on its side and slip up the batteries just enough to reach the screws. I swapped out the Philips heads for Allen wrench head.


Here is a bit of a close up. I found this much easier to use a 90 degree tool to bolt that in then a screw driver.

I have 1 leg ready so I turned the droid a bit and bolted that leg on. Next up is putting together one of the outer foots. There is a certain order for this to be done that makes it easier so read along.


 1. First you install the hoses into the battery box.
 2. Then you install the hoses in the foot and don't forget the foot strip, its easier to do this now and about impossible after the foot drive is installed.
3. Now you can install the ankle to the foot, you can also do this after the foot drive is but its easier to do it now.
4. Install the foot details on the side. If you install the foot drive system you can't install these parts as there is no room to reach the bolts. I learned all of this the hard way with trial and error until I found a good way to put this together. Despite the fact I painted these feet and related parts over and over again to get them perfect. Just be ready to see additional scratches as this don't exactly slide together easily. I think later I can just buy an airbrush and do touch up on parts I don't like.
Such as the other foot I did last week. When I put this together the foot strip did a 180 swing and scratched in a smily face into my fresh paint. Damn it! I refuse to take this apart and try to get it assembled perfect. Some masking tape and an airbrush will fix this up later.
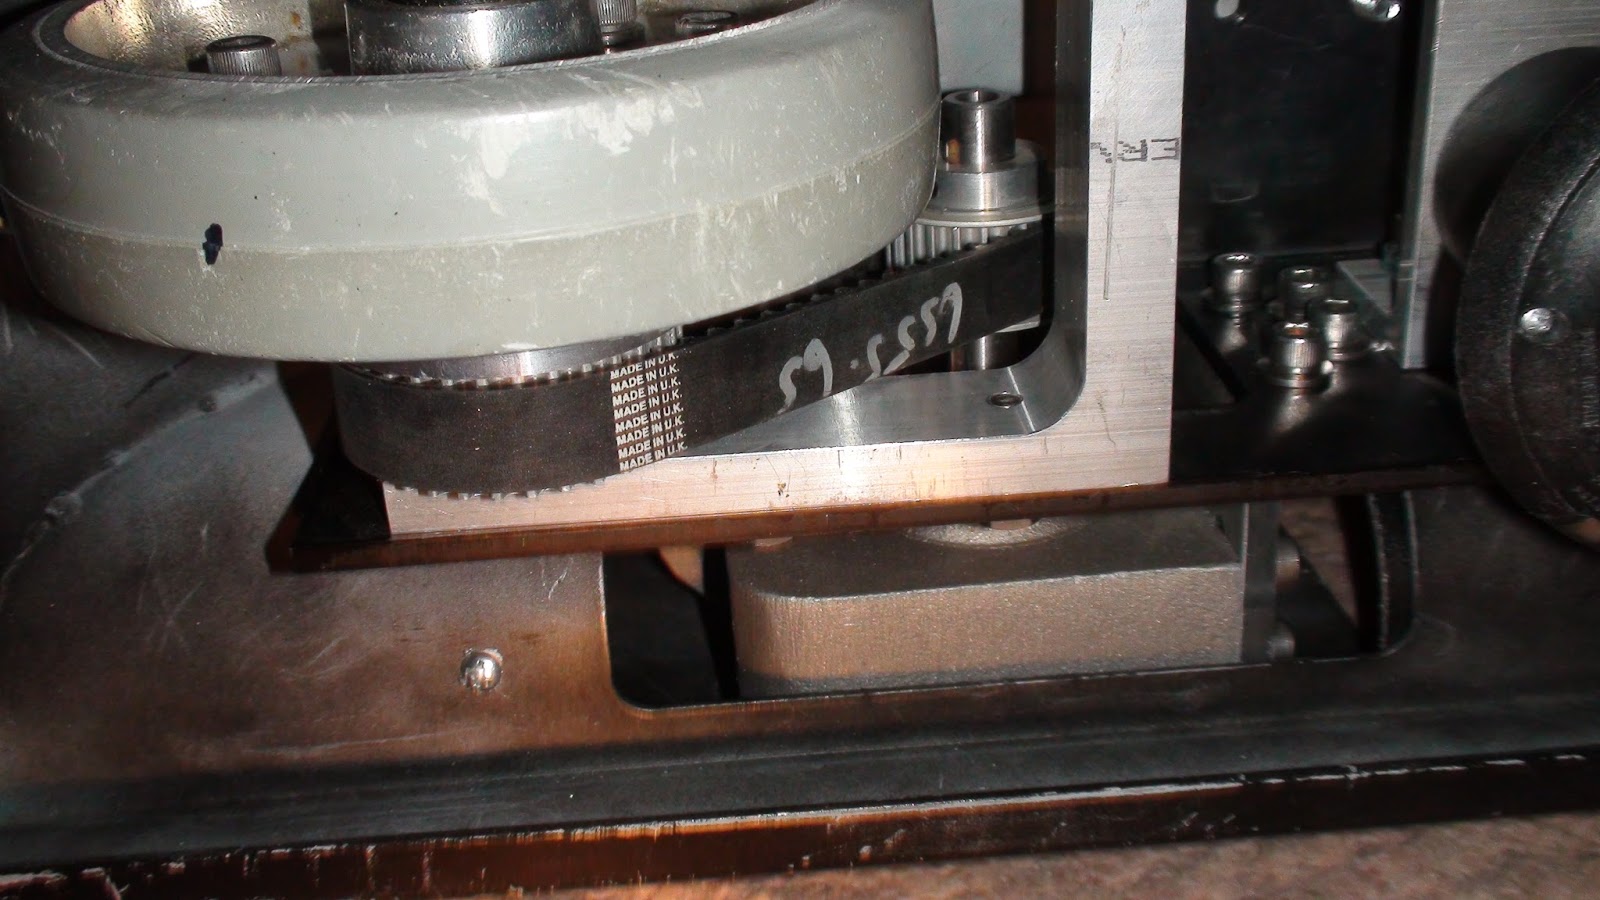
5. Anyway now you install the foot drive system in my case it's an original JAG foot drive with 1 wheel.
6. Install the NPC motor now and then you shove the wheel and get the belt as tight as you can and tighten the 4 bolts. DO NOT have the wheel in the position you want and then install the NPC that will make the NPC motor a bit crooked. Now slide the battery box over the NPC motor.
7. I used 2 self tapping sheet metal screws to attach the batter box to the foot shell. I got a nice and solid fit doing this. I'm using battery boxes supplied by R2 member Matt and they are really nicely done.
8. This is where I placed the other screw to keep it bolted on. I hope the foot is somewhat level if the rear omni ball is too high I'll have to take it apart and adjust it. As a rule of thumb the droid only drives on the wheels and not the wheels and the omni ball. Most have the omni ball about a 1/4 inch lower than the wheel and the omni ball is sort of a backup system form when your droid takes a hard stop or goes in reverse.

Other misc problems doing your install.

There is a good chance you're going to have to grind down the top of the NPC motors or the battery boxes probably won't fit. This is kind of a right of passage for a builder.


Not everything is easy peasy what I find is my foot drive is about 1/8 of an inch off the center channel as the red arrow in the image above shows. The green dots I paint  in the U channel are where I should have drilled the holes. So 1 side of the NPC needed more grinding than the other side needed. Make sure the foot drive is centered perfectly in the U channel of your foot shells or there will be hell to pay!
What kind of hell to pay? This kind of hell! As I said before if you don't have this centered too well as I found out. You might be grinding extremely deeply into 1 side of your NPC motor is the hell you'll pay of screwing up $320.00 in motors and close to $900.00 for your foot shells you wrecked and need to have spot welded to save it. Read, read read alot of blogs before you try to wing this like I do!
This part I got from 'somewhere' I don't remember that are dual nuts to hold the hose in the battery box didn't line up. So I just cut that in half with a dremel, no biggie.

Last tip: Don't put any clear coat of paint on any of your parts as they might get messed up in assembly and you never known when final assembly is until its sat for months completed. I plan to air brush the parts later to fix them. This black Death Star Droid should have NO weathering, not until the Death Star blows up, until then it was shiny and clean looking.

Also don't use loctite (yet) because as a droid builder you never know how many times you have to take these various areas apart until you have parts just where and the color you want them. I'll probably be taking these feet apart several more times to adjust the feet level if needed and other things that will pop up. I know how R2 builders think, install something use loctite and think " This part is done, I can cross that off the bucket list". No part is ever done, you're just done with it for now... 

Wednesday, April 6, 2016

R2-Q5 Electronics

I've been working on this droid alot lately but haven't blogged my progress in a while.

My old batteries which barely got used were old and died. So I have new batteries and I've made my own electronics board out of 12x12 inch by 1/4 inch thick aluminum.


 The panel has holes that I have 1/4 inch hand studs that attach to some L brackets mounted on the frame. I can in about 1 minute unscrew the 3 bolts and unplug main power then disconnect and take all of it out if I need to.


I took some photos of the switch settings on the motor controls for future reference.

Thursday, April 30, 2015

R2-Q5 Center Foot Build

I can't believe its been about 3 years since I did lots of updates. But here's more work I've been doing. This center foot took me about 1 month to do from start (have all the parts) to painted and completed.

It don't really take that long to assemble this foot. But it was 4 years ago that I constructed my other foot on R5-D4 and the center foot shell was manufactured different and I simply forgot how the hell this thing is assembled. So I looked up past center foot build and that gave me most of my answers I needed.
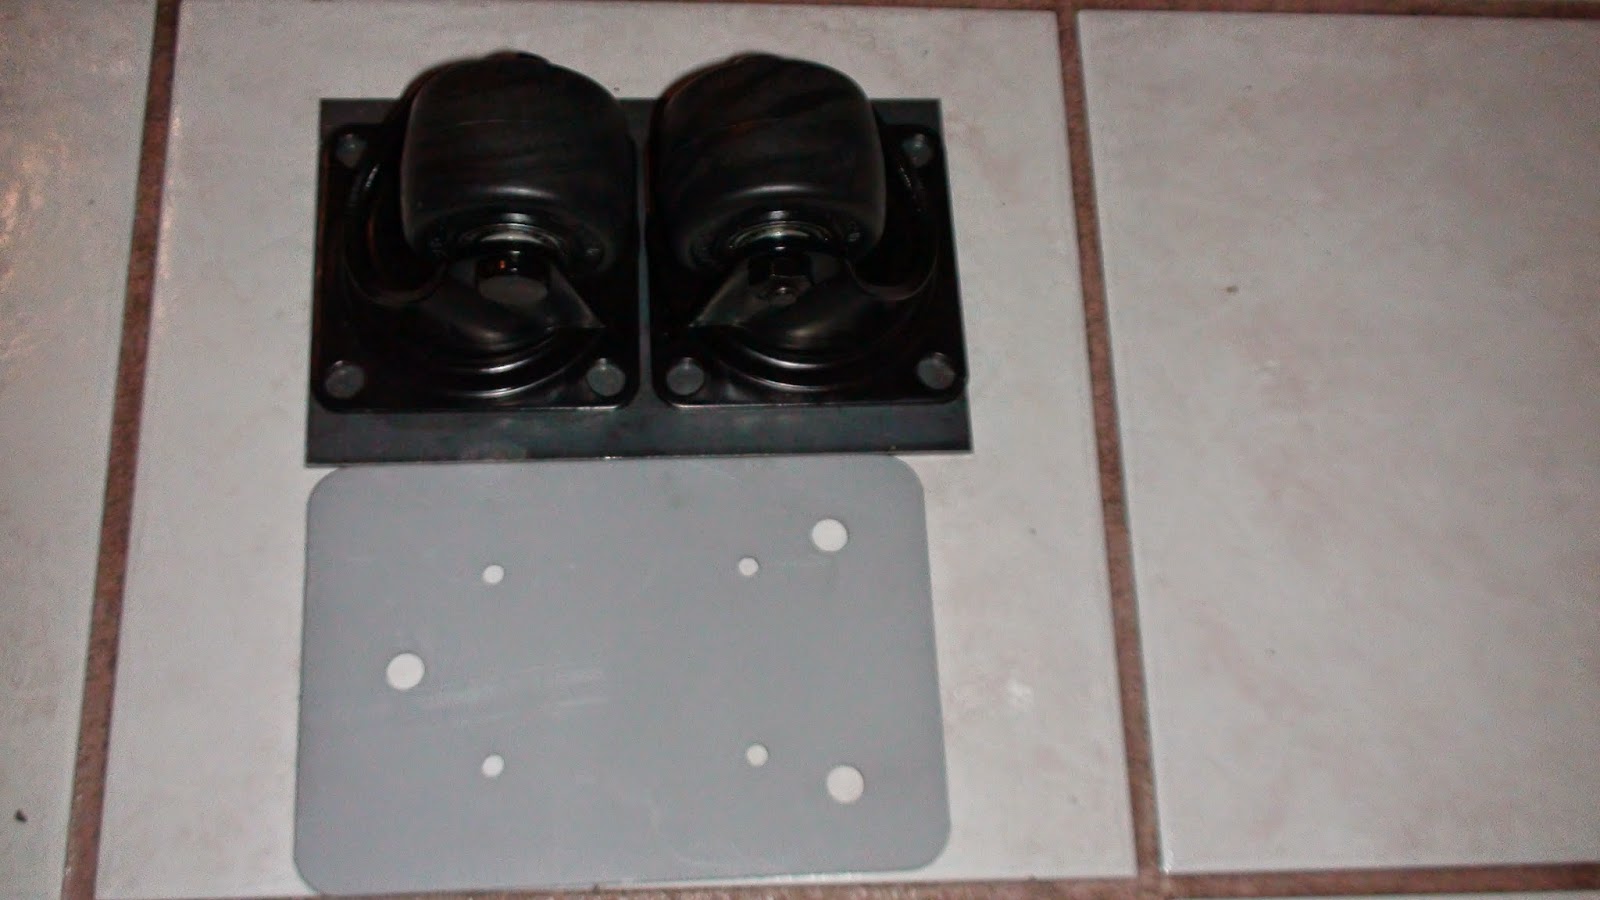
Pictured here are two heavy duty Misumi casters. These casters cost around $60-75 each! and they weigh a ton. The two casters are sitting on a steel plate that is not yet primed. Below the steel plate is a primered steel plate with rounded corners and has 3 large and 4 holes already drilled into it. This was the old standard hardware that came with the JAG foot system he created. That worked just fine for certain types of casters but these expensive monster Misumi casters need a long steel plate. So I went to Online Metals and orders a steel plat that is .125 by 5x8 inches as shown above. The cost was $4.40 and $6 bucks to ship.
 The center foot I painted black and then fastened the footstrips on bolts and lock washers. I used some Glazing Putty to cover the holes int the foot strips. I also drilled 3 holes into the foot channel to attach to the U shaped hardware. I realized I only needed 2 holes so I bondod the center hole and repaired it and reapainted it black. For this type of build everything has to be assembled in order or it's a bigger pain in the ass than it already is.
Next up I got the 2 steel plates ready. The U shaped steel plate on the left had many holes already drilled in it. I taped 4 holes for what I think was 10-20 screws. Then I screwed on the 4 spaces you see in the U channel plate. Next to that plate on the right is the steel plate I ordered from Online Metals. I placed the casters on that plate and used an automatic punch to mark where I wanted to drill and tap what I need. So I taped 8 holes 1/4 inch if memory is right and screwed in 8 bolts. Then I drilled and counter sunk 4 holes that will be used to attach this steel plate to the U channel plate. I used a bit of blue Loctite but if you also do a build like I have, it should never come apart. Also after I tapped all the holes I needed I cleaned out all the junk from tappng and then primed the steel. Remember to do this or it will rust.
For illustration of how this works I put the top plate on the U channel so you can see how this will go together inside the footshell. Also note the 8 bolts are a bit to long and I ended up using a dremel to cut the bolt in half to make it easier to put locknuts on later.
Now for the actual foot construction. This was for me hands down THE hardest part of this center foot build. As I said you need to assemble this in order or its too much work trying to assemble nearly 20 pounds of steel and aluminum. So you start this by mounting the center ankle cylinders to the center ankle. What you see above is the only method I was able to do to attach it to the ankle. I don't remember how I did this on R5 as that was 4 years ago and I don't remember what burger I ate yesterday. So at first you will simply try to bolt these on using allen bolts or hex bolts. The problem is the area you have to try to get your fingers down in is too small. My fat fingers pretty much take up the entire area. I tried to find a person with very tiny fingers to try to get the allen bolts on and it didn't work.

So above is my solution. I went to Ace Hardware and bought a threaded rod that is 10-20 by 2 inches long. Then I screwed the bolt into the cylinder as seen above and dremeled off the bolt until it just has enuff meat for a locknut to fit on. So now the bold easily go into the center ankle and instead you need some tiny fingers to get some locknuts started. Then finish fastening them with a wrench. I don't know how other builders pulled this off, but that's how I did it.

So after both cylinders are on the center ankle you are free to attach the center ankle to the center footshell. That part is pretty easy so no photos needed.
Now with center foot and ankle attached I bolted on the U channel with the 4 stand offs as seen above. After you finish that get the 2 half moons and outer foot plate and attach it to the 4 predrilled holes you see in the U channel. You have to do this now because after you install the 5x8 steel plate you won't have access to this areas anymore.
Next install the 4 bolts that fasten the bottom steel plate to the U channel. I got 1 of my holes a bit off but it all holds together extremely snugg and well build.
Next drop in the 2 casters and put on 8 locknuts and it's about ready to mount on your droid! Notice that these awesome casters do not touch or bind together when at their closest. There is also no need to remove material from the footshell like many others did in the past with casters that have a wide swivel range.
Here she is. R2-Q5's center foot ready for action. This thing is  H E A V Y. Weighing in at 18.4 pounds.

My Cylon Helmet

I haven't done an update in a while but I have been working on various projects so here is an update.

I ordered a Clyon Helmet from Starbuck. Here is what came in the kit.

Kit came with 2 side of the helmet, mouth grill, some black resin parts for the eye area.
This eye scanner I found on ebay from a guy out of Canada. It was around $50 bucks and a rapid solution to get the eye up and running.
So I removed the extra styrene from both haves of the helmets and then used left over styrene to make small tabs as seen in the mohawk. I superglued them in a staggering manner. I also took a pencil and hand drew where I needed to cut out the eye and mouth sections with a razor knife.
So with the eye area cut out that brings me to this. Its about ready to fasten together and if you do this alone it can be a bit tricky at first.
I used rare Earth magnets and a clamp to hold them together while I spot welded it slowly with super glue.
About an hour or so of doing that it left me with this! Now its starting to look like an old school Cylon. The helmet still needs more reenforcement with styrene.

So I put super glued in more tabs to make the helmet more sturdy. It looks a bit ugly inside but that will change.
Next I got a glass jar and poured Weldon 3 in there and cut up scraps of styrene and let that set for an hour and start to melt into goo. Then I used a cheap throw away paint brush and started coating the goo over the entire outside crack and then in the inside also. This stuff smells nasty so don't inhail it if you don't have too. I think Weldon 3 is not legal in California.
Here is a photo of inside the bucket. The plastic tabs are alot smoother now and the inside is reenforced pretty good. I left the helmet out side to cure for several days. PROTIP: Don't over do it with uber layers of the white goo. If you need to apply alot to build up an area do it it layers. If you try too much when its time to sand, you'll notice the white goo gums up and don't sand worth a damn. If you need serious build up then try Bondo instead.
After more sanding I applyed some Glazing Putty (red colored material) to further smooth out the mohawk crack. If you look closely in the old TV series you can clearly see both halves of the helmet and what looks like Scotch Tape holding it together. So one don't need to go this far with removing the crack if you want to look cannon.


Thursday, May 31, 2012

Working on R2-Q5's dome

Here is my construction of the R2-Q5 dome in styrene. What seems like an easy project has turned into quite a challenge, read on.

The inner and outer domes didn't quite fit so I had to cut the inner dome in half. I used Weld On 3 first to put the spider looking ring on. Glued the bottom but it didn't hold.
 So I used my trusty magnets to clamp and slowly glued section by section until it was secure. Don't add too much Weld On 3 or it will worp the styrene.
What worpage might look like! If this happens don't panic. Its from using too much Weld On 3. So I used a mouse sander with 120 grit and some glazing putty to remove it. Expect the unexpected or known unknowns as Rumsfeld likes to say.:)
Now that I have the outer dome back to one piece with the inner top dome fasted. I start cutting in the detail pieces like the Holoprojectors and make pencil marks of the panels locations.
Then the next logical step seems to be to paint the the aluminum HPs. Or is it?
Then I installed the HDPE ring and had to custom notch for 1 HP and 1 of the PSI. The PSI install I'm just making this up as I go. There is no instruction manual to this unless you consider this blog posting one.
This is what the other side looks like. After 1 year as a parts collector its fun to finally put this project together. I gotta hurry though since Comic Con is two weeks away from the time I snapped this photo.
Its hard to see but I'm now joining the entire inner and outer domes. I'm starting on this side and will work my way around. I'm using dimes as spacers to keep the gaps just right.
Right after I welded both parts together I get online and check out the rare photos of R2-Q5. Lazy me I should have did that first. This black section of the ring is not supposed to be painted black. If I don't fix this its the kind of thing that will keep me up at night so time for a Qtip and Acetone to remove it.
Okay, this is more like it. I like the offset look it has like this anyway.
Ut Oh! What do you have here? This don't look right at all. Well, what happened as I moved around the dome with Weld On 3 adhesive bonded inner and outer skin. Not only did they not fit well top and bottom wise. They don't fit diameter wise  and off 3/8 of an inch or more. So I ended up cutting the dome hoping to fix the spacing issues. So I was stuck and pondered for a while what are my opinions now?

1. Toss it in the dump and order another dome and recycle some of the parts.
2. Ponder more until I find a solution.


 Should you find yourself in this situation of a dome giving you a hard time like I have. The next step is to get our your chainsaw and start cutting it to make it fit.
Just kidding I used a 'box cutter' not a chain saw and removed the out dome which I'll have to make do with what I have and some how get this to work. It does seem kind of hopeless at this point but I'm not giving up yet.
Then I got out one of my useful tools I ever bought which are rare Earth magnets (clamps in this case) and used it to bond whats left of the outer dome the inner. I didn't think that Weld On 3 was so strong but once you glue something with it its not coming apart unless you bust it up.
So at my last stop I'm going to have one hell of a bend or bump in the dome since I'm forcing this. Inside I have a very large 2 inch rare Earth magnet.
So I got it done. Its all down hill now I can just trim the 2 or 3 outer pieces to fit and just put filler over it and paint. Less than 2 weeks away from Comic Con and I really don't need anymore surprises in this build.
It's all coming together like one massive jig saw puzzle. I like to post all the good stuff about building these droids and some of the harder challenges so if you find yourself in a situation like this don't give up. Usually there is a way to keep going even when it seems like you come up against a wall.
On the inside of the inner dome I also made over a dozen slices before I glued both sides together to help make them fit a little better. 
Here's some of the tools I'm using at this point a mouse sander, drill and a trick I learned from another builder Droidwelder to join styrene or weld it. You add Acetone into a glass jar and then add your scrap styrene (don't throw any way). Then you wait about 1 hour for it to start to melt the styrene. 

Next us a paint bush and dig our that white glue and put it over the seems or cracks you're repairing. Wait 24 hours for the Acetone to evaporate and then use an electric sander to grind down the your sealant.
Even though I cut up the outer skin and forced some sections to fit I ended up with a bump or a choke point where then end point was last seal. It was like a bump in R2's head it was sticking out too far to sand down. So I took our a step bit and drilled the entire bump out and removed it completely.
Looking from the inside of the dome at the hole I used scrap styrene and a magnet to hold some backing on there to patch the hole up. I'm just making this up as I go along now.  Starting to stress out as I have 11 days to Comic Con and this still isn't painted and I keep have surprise issues spring up that take days for things to cure or dry. Sometimes in the construction industry when they are out of time/money to complete the project the term 'rape it' is muttered to fly through the project just to get it down and give them a bumper warranty. Warranty lasts aslong as you can see the bumper of my truck leaving is the saying. I'm not at rape it yet but its in the back of mind looking at this dome.
It took 3 days for the styrene to dry over the hole I made and it still was wet. So I dug that styrene out, used JB Weld instead then glazing putty and were getting closer and closer to painting.

The Comic Con is only 7 days away from the time this photo was taken and do or die I have to put the black coat on by Sunday and I haven't even started on the radar eye yet. So its time to 'semi rape it'. I figured only I'll see the bad stuff and everyone else will look at it for a few seconds take a photo and move on. I can fix the parts I don't like later. Plus when you paint something black it will show every imperfection there is that you can't see until its painted.

I also forgot to mention after I paint it primer, black and then some parts copper. I have to install all of the electronics. So yeah, its rapethirty at this point of the build.

As I installed the Teeces logics I had unexpected bugs and it didn't work of course. So I grabbed the electronics out of the tinted dome and they worked just fine. 
I got the dome done just in the nick of time. The feet and skirt aren't done yet. More on Phoenix Comic Con on my next update.