Saturday, February 5, 2011

Center Foot Complete

The paint on this foot has been drying since last Sunday in the garage with other parts and today I put all the pieces together for assembly. So I'll show how I put this together. Here is inside the center foot shell with the bend steel plate screwed on. I already fastened the center ankle before I attached the side plates and half moon details.
This is the lower steel plate. I drilled and taped 8 1/4-20 holes. I used grade 8 bolts in the outer area. On the inner area I don't have much room so I used steel hex head since they are close to the other holes. I even grinded them down so it all fits very, very tight.
This is the other side of the plate. Since my 2.5 inch casters are only 5/8 of an inch off the ground I changed the 8 bolts to be 1/4-20 by 1 inch in length. Then added  steel 1/2 inch spaces (not pictured) so the casters should clear 1.2 inchs off the ground matching the height of the JAG drive system.
Now that lower steel plate is screwed on. Note how those inner bolts nearly touch the screws. Next time I do this I'm going to make sure no predrilled holes are on these steel plates. That way I can use whatever casters I wish and not have to deal with holes I'm forced to use. I made the best of it and this foot seems pretty solid.
The casters are now bolted on to the steel plate. I didn't use any loctite yet and want to do some testing later to see how this all works out. I can take all of it apart in a few minutes if I need to do other things later. I filed down the footshell just enough so the casters can rotate. PROTIP: Don't file down while casters are in place. Also blow out all the shavings you filed down or later they'll find there way to the grease on your casters. Then you'll have shavings in the bearings screw up how they spin. Ask me how I know!
There is maybe 1/8 and no more clearance between the casters and the footshell. I feel happy to have this done and feel like some real light at the end of the tunnel is coming. When I started this project I couldn't see why it takes years to make just 1 droid. Now I understand. There is a hell of a lot of manual labor and work. Even if you buy some premade aluminum parts there's lots of stuff you have to do.
Nice! Here is a side view of the foot before I install it and it gets weathered. All I'm missing is the cylinders that attach to the center ankle. I have no idea how you get small hands to screw those on anyway.
Here is a front view of a nicely made center foot. Eventually I hope to upgrade R5 to steel feet. These are aluminum foot shells. One day on this blog I'll be painting these black and R2-Q5 will have these instead. But for now its cool enuff for my main tank droid with the Comm8A frame.
I didn't measure how high the foot is off the ground now but I'd guess its about an inch. I was hoping to get more done today besides this. I wanted to tap some holes on Q5 and cut some styrene skins that will go on Q5 and later be painted black. Thats alot of careful razor blade cutting I need to do. I only have a few days left then some foot drives will arrive and I'm back to work on R5. There is alway something to do on one of these droids. There is a ton of work to do in the next 2-3 months until 2 major Cons take place.

Wednesday, February 2, 2011

Frame Assembly Comm8B

On the right is the new Comm8B budget frame. Its half the price and lighter in weight compared to the frame on the left. I sanded the new frame on the right with 150 grit and washed most of the main pieces to get the oil off. Then put it together in about an hour. I like it, it will make a nice main frame for my imperial droid build.
Since my new droid will be black I get to cheat some making it. The details of the black parts wont' be easy to see unless your really close up. So I can get away with resin parts painted black to lower the costs. The aluminum on this droid will be the frame, legs, ankles and feet. The rest if it will be made from resin and styrene parts to keep the costs down and the weight down.
This droid won't have a back door. The electronic panels are already on the side. This droid will drive around and do head rotation and not much else planned or budgeted right now.

Tuesday, February 1, 2011

New Frame Comm8B Arrives

This is the Comm8B frame unpacked. Looks like a lot of fun. I'm going to have to sand and clean all the oil off these parts before you assemble them. I'm going to have plenty of work to do this weekend. So R2-Q5 finally starts to come to life.

Sunday, January 30, 2011

Painting the Center Foot

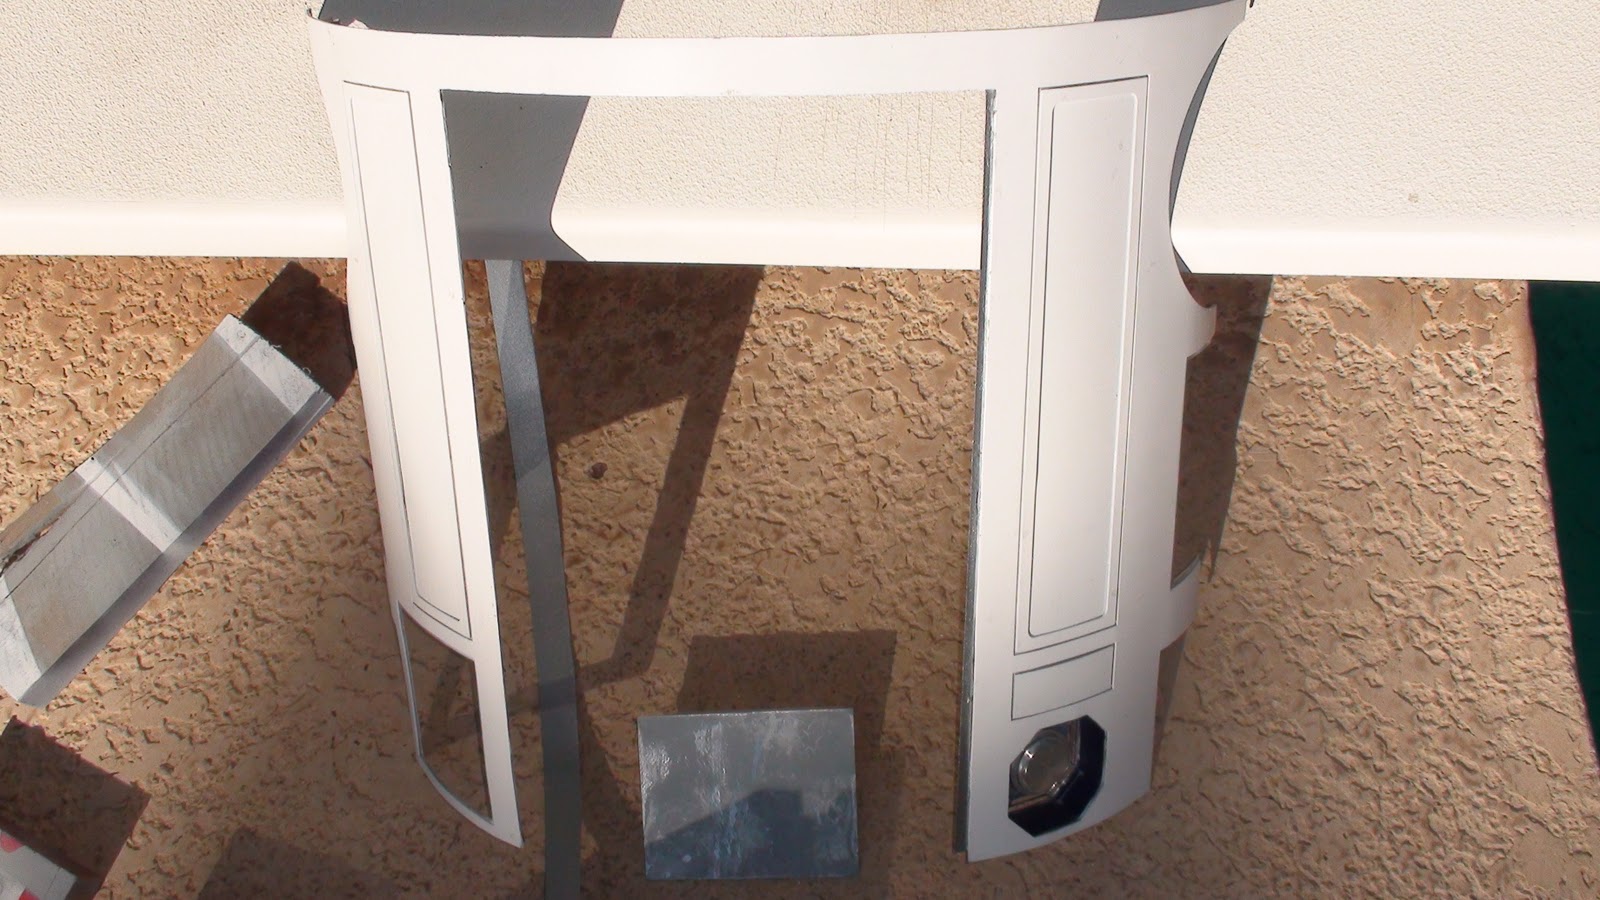
I'm getting the center foot ready for paint. I covered the screw holes with 2 small coats of JB Weld and sanded that. Then put glazing putty over it and sanded it until I was happy with it. The foot will be painted white and used on R5 until I can locate some steel feet. Then these feet will eventually be painted black and put on R2-Q5.
I was going to start in on the outer feet by attaching the U channel to the feet using the same method I did with the center foot. I think I'll wait until I have the JAG ankles to make sure everything fits together and is wide enough. My center foot isn't JAG and I needed to file some areas so the JAG ankle would fit in nice and tight. That will be my next major project on R5. When that's done he'll stand on 3 feet. I can't wait!
The center foot had its first coat of primer and I'm using the Sun to check for flaws you can't see under indoor and other lighting circumstances. While this foot dries I'll cut some foot strips with a jigsaw out of .125 x 1 inch flatbar. You can buy 5 foot of that from Ace Hardware and have enough for 2 droids worth of foot strips.
I'm also working on making the back door fit better. On the right side of the back door you can see I added a strip of aluminum along the side of the back door. I have a painted strip on the cement that I'll glue on the left side next. The reason for adding this is so the backdoor can't fall thru. There is a tiny lip on the back door that this will rest upon.
Here is a closeup of the small back plate I glued to make sure the backdoor don't fall in. I got the idea for making this from the image below from Astromech. Its of the ROTJ with a droid with a full back door open. You can see a silver lip that goes around the back door.
So there is about a 3mm lip that will rest on that guide. Here is a pic below showing what will rest against it.
A top down view of my backdoor. That 3 MM of the skin will rest against the silver bracket on both parts of the back door preventing it from going thru the skins. I can file down the back door skins or add to them using filler to adjust the final gap you'll see on the backdoor.
My first coat of white is drying. I'll wet sand it with 600 grit and take out anything that needs to make it look better next. I'll give it a second coat on Monday and let it dry for a couple of days. Then I can assemble the side plates and half moons, then the wheels and this part is ready to mount.

Tuesday, January 25, 2011

Putting Wheels in Center Foot

I ordered some 3M Dual Lock tape and taking off that velcro on the rear skins to see how I can make them suck to the frame better.

Until then I continued to work on the center foot.
I ended up going with (for now) 2.5 inch caster wheels. These wheels were the best I could find after going to Ace Hardware, Lowes and Home Depot. At this point in my build I can't afford to just order random wheels online and see if that works. This will get me by until I get the droid on 3 feet and see what needs upgrading.
With these 2.5 inch casters there is still barely any room but the wheel clear after grinding away some AL. I got a bad feeling about this tho. It seems like sure, this could drive around on smooth surfaces like tile floors. I can't see these small wheels ever clearing elevator doors, going on asphalt and sidewalks without a face plant. That's scary looking to me.^^^
 Here on my first foot build I'm sitting at 5/8 of an inch off the tile. Is that what its supposed to be? I have no idea. I'd like to put 3 inch casters in this foot but how? It ran out of room in 2.5 inch casters. Hmm much thinking this will take.

Sunday, January 23, 2011

Test Fitting Back Door and Center Foot

Today I was doing some test fitting of the back door. I'm not sure how to mount this yet. Magnets or velcro or something else? So far the fit is tight and loose. The gap on the left skin skins is too large. The skins need to suck up more to the frame. I even have velcro on that section and its not good enuff. Huge gap anyway. That is something I'll need to fix. I think I'm going with velcro to attach this back door.
Here the door is held in place by nothing yet. The gap on the lower left is something I have to fix somehow. Over all I'm happy to even be this far in my droid project. 
Its time to get back to work on the feet. The feet are now my main project that the skins are 90% done. Except for the center vents and putting velcro or what have you mounting the back door. I'm moving on to the feet. Here is squeaks sniffing all the work. A JAG center ankle with a budget aluminum foot I got from another builder.
So far a test fit of the center ankle to center foot is working fine. I'm going to blog how my center foot is put together in upcoming updates. Here I have test fitted that inner piece of aluminum to the outer foot shell. I have found out in order to be able to get your fingers in to reach the center ankle pilot bolt. You'll need to dremel down some sections for your fingers to fit.
The blue tape is gone and now this inner plate is JB welded on. Before I did that I cut out a few MM of the top part if you look closely in the photo you can see it. It has a smaller back section then the rest of the plate does. This is to allow your fingers to get in there and screw in the bolt for the center ankle. I hope! I dunno what the hell I'm doing I never done this before and basing what I'm doing by other peoples pics.
This is the bottom part of the foot where I JB welded those inner plates or whatever they're called. I'll do another test footing with all the parts after this drys and figure out what to do next.

Thursday, January 20, 2011

Back Door Construction Done

Finally after what seems like and what was months messing around with the back door its done! It took so long because of several things. Waiting on JB weld to dry. Breaking alot of 4-40 taps. Screwing up things and redoing them over a couple of times, countless times redoing coin returns and so on.
I ended up with a few spots that had a lake of super glue in those creases. Thus removing them via a file scratched the paint.I plan to repaint the skins where needed right before Droidcon and Comicon. I think on my second droid I'll build the entire thing and then paint it black after I have all the parts or built all the parts needed. So for the time being its sporting the 'weathered look'.

My next step is figuring out how to attach this door to the droid. I'm going to experiment with velcro and maybe magnets later this weekend.

Life form Scanner. One of our awesome R2 builders did a run of life form scanners so I bought one for R2-D2 and one for R5-D4. It just arrived today!:)
Here are both of them. When its all put together it should look like this.
One of my main questions I had is will this even fit into R5's head? Because the panels on the dome are smaller than the panels on an R2 head. 
The answer is yes it will fit into an R5 head just barely if you turn it sideways when it stores inside the dome.
Here I have the screen taped to my antenna to get some idea of height it should be when I figure out how this is gonna work. 

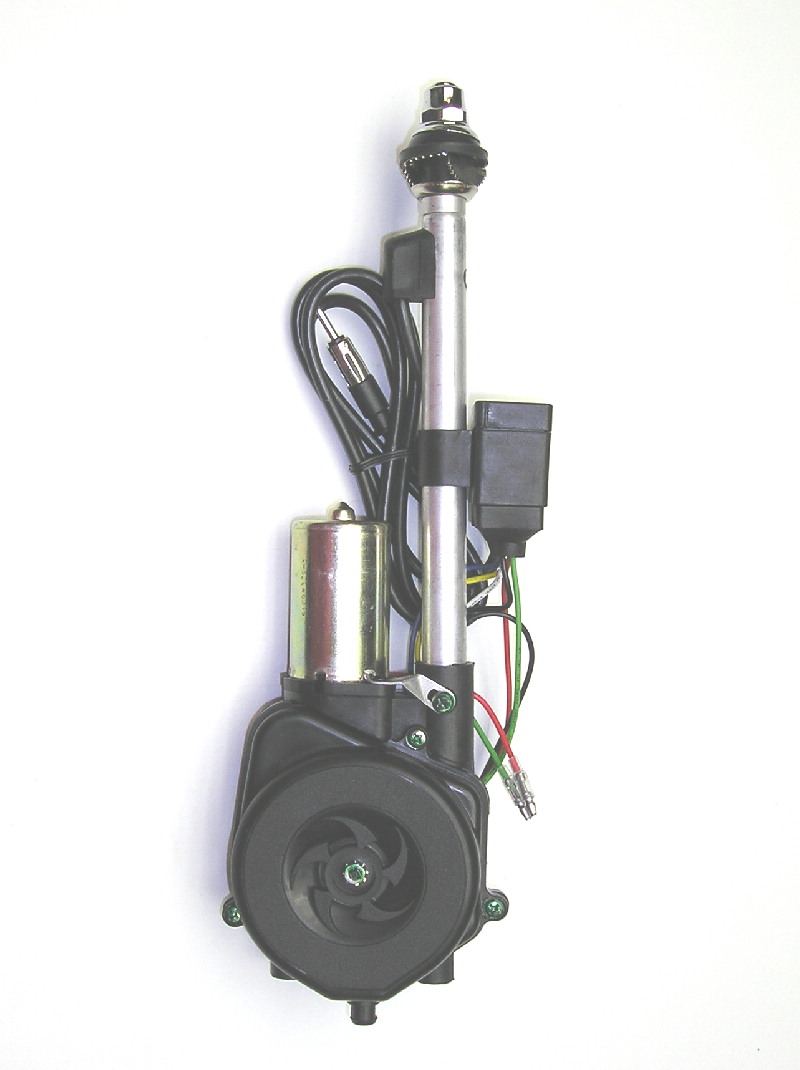
I think next I need to order a used power radio antenna off ebay. Then mount my JAG dome plate into the R5 head. Then I need to somehow mount it on the dome plate with L channel. 

I'm split on if I should use my 15 channel RF remote to open the 8 panels on R5 and activate gadgets. Or if I should program the JEDI system to do that with JAWASCRIPT. Or another possibility is using that prescripted micro controller boards that you connect to your computer and program it with code to run or trigger a routine. Hmmm. What's the cheapest?

I only have 7 hinges left and that's all I need for this R5's dome because 1 is used on the periscope. So I'm tempted to rip the head back up and start hinging panels. But I only have 3 months until Droid con and Comicon. I dunno if I'll have it done in time. Plus I need to complete my feet and start work on the next droid. I can't do everything. So I think I'll leave the R5 head intact under after those events and then put all the gear inside that I can.