
Rich uses a CSI-STATION1A from Circuit Specialists Inc. Pretty good deal for $30 bucks.
He decided to start off with the easy piece first the Slip Ring Connection Kit.

This is a pretty straight forward deal and pretty simple. First read the manual get to know the job. Then add all the components you see here. Rich advised not to use a pointed tip and to use a flathead tip.Using 22 gauge solder you touch the solder tip to one side of the component and let it heat up for a few seconds. Then apply the solder on the side and let it melt and wrap around the little stub. Then solder each one methodically. After Rich finished one of these boards I did the other one. I took about 20 minutes or so per board. I have to admit it was a good lesson to get your feet wet if you never did this before.

Rich then checked out each solder for holes using a 25x jewelers glass. My HD camera's macro shot here does the same but shows dozens at a time. Where as his shows a single one of these contacts in full screen view.
Now is the harder portion of doing this.

With one hand you hold the wire it don't matter which one to the first DB 25 connector. With your other hand you move the soldering gun tip to the either side of the port. With your 3rd hand you add the solder after you allow a few seconds for the connector to heat up. You might need two people for this or a set of helping hands and a large magnifying glass is a must.
We did a continuity check on each wire to make sure each one was the same on both db 25 connectors. Note there are two blue wires. Make sure you're sending the right signals through the proper wires. Then its plug and play after this. Also note on this Scott has determined that port 7 is not used. There are 24 wires in the slip ring and 25 possible contacts on these connectors. Thus 1 channel is not used.

When your done it should look something like this. Now to install this in your droid you simply just very carefully put the bottom port of the slip ring there your frames center hole.

I decided that I wanted to mount the female board on my electronic drop down panel. But the slip ring wires aren't long for that so I need to order 1-2 feet DB 25 extension cable.

So I redid my electronic panel already. I mounted some of my boards side ways to try to utilize the space more. I had to move the JEDI control because last time it touched the Pitman motor as you can see the holes left over.
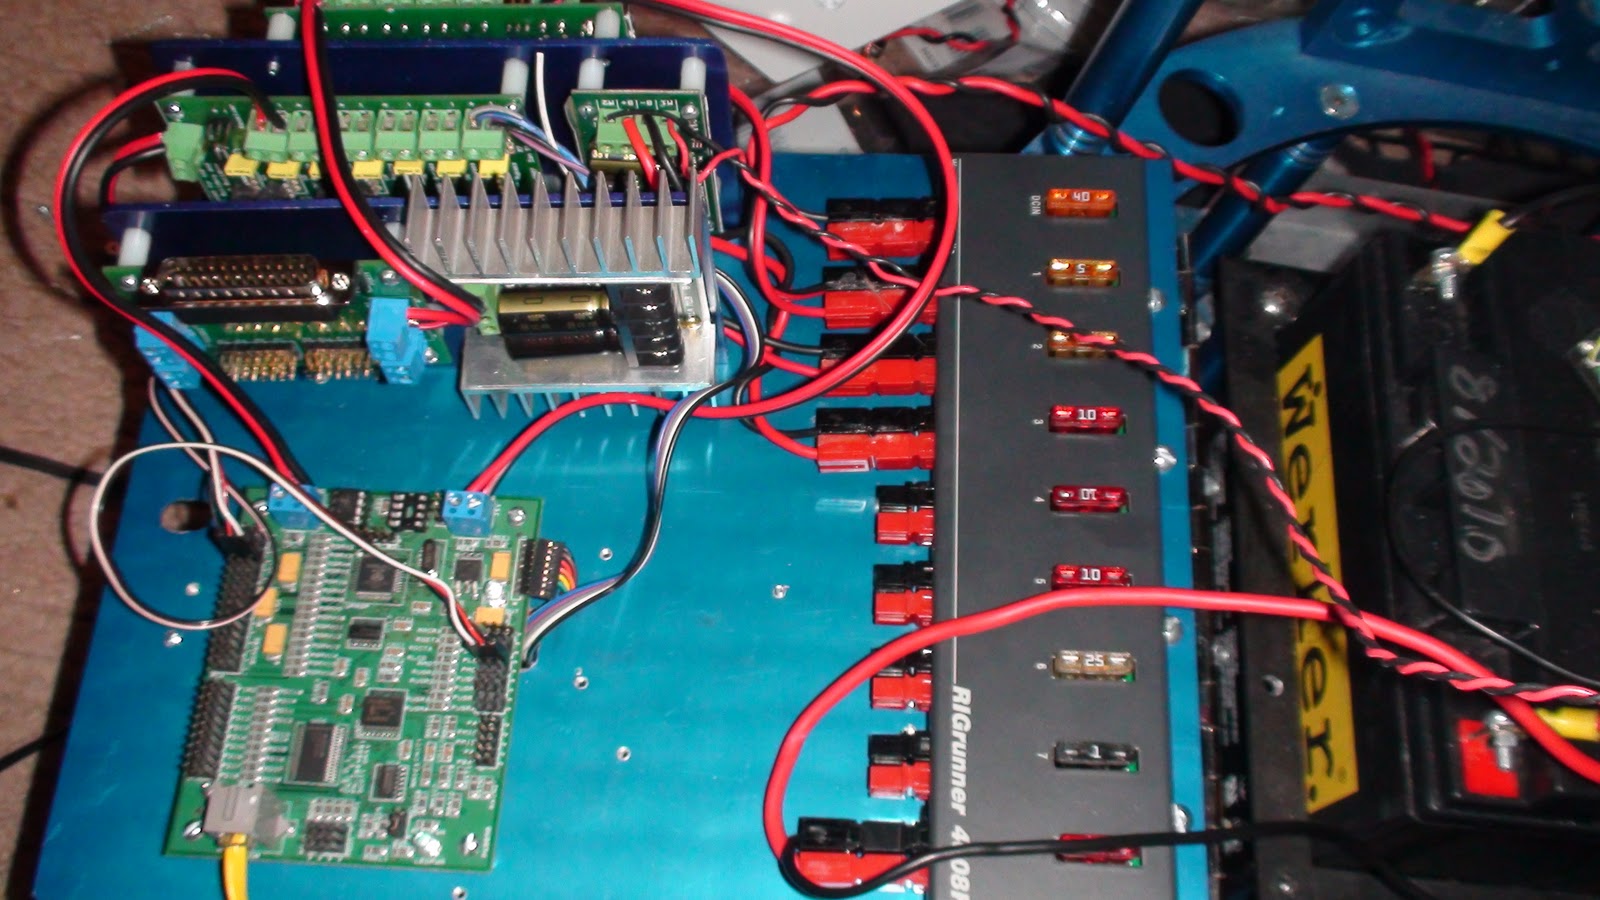
You end up using these 12 volt connections fast and I don't even have the feet motor controller wired yet. I need to go back and make sure what I do have hooked up is fused properly.

At last, I have now power to the top via the slip ring and confirmed on one channel I powered up in the body. Now I need to mount this board in the head.

Here is a look inside R5-D4's head! The slip ring connection kit receives 12 volt power from the body. It powers up that purple LED RC board that I control with a remote. There is plenty of room in this head left. In 2011 I plan to upgrade this R5 head and open all the panels with hinges and servos now I have the electronics in place to get started.

The back panel is now hooked up like this. LCD to read the JEDI feedback, voltmeter, memory card and Vex receiver with the vmusic2. This will change as I add more parts and reconfigure as I go.
Now my droid looks like this.

No comments:
Post a Comment