Wednesday, December 29, 2010

Rear Skin Done

I did my first test mount of my rear skin. I fixed the wrecked paint from the clamps. I ran into some issues about Rustoleum changing what I was using in the middle of this. I Ended up painting this part 4 times to try to get all the parts to match. See I painted all the rear skins months ago. Including the back door which is about to be assembled next.
Almost there! I still need to add velcro on the lower skins to attach to the side beams so it fits tighter.

So the plan for tomorrow is to take the rear door off the hinges. Remove the hinges and start test fitting the door and figure out how I'm going to just use velcro to hold it on. Plus I don't like exactly how the skin holds onto the door frame. There are spots that should be tighter so I'll probably retap a few areas.

Also I made sure I didn't put too much super glue on the two large rear doors. I'll probably end up with some more hinges someday and get bored and say. Hey lets hinge those rear doors a few dozen blog posts from now.

Electronics on the droid have been offline for about a month until I get proper fuses for the rig runner. The default fuses are too high and I'm ordered a bunch of 3-5 amps fuses to protect my gear from blowing up.

Monday, December 27, 2010

Periscope Lifter Arrives

I got me some new parts for the R2-D2 head. Thank's to Wayne Astromechs main dude, he deciding to part with this Periscope Lifter. Some parts are simply cooler than others. This actually 'does something'! It will lift up a periscope up or down or you could use it in other robots for something. One question all your friends ask you is: How much did that cost? Followed by: What does it do?

These kind of custom made parts in limited runs make your droid come alive from the default static mode you start out with. Now if I only had a periscope to mount on this. Another reason I've been wanting this part was to study it. I want to copy its functionality to make a carousel of 3 of these in 1 larger device. The idea is to have it behind both large doors on the body and be able to spin around so 1 of 3 different types of arms can extend out, then move up and down then retract. Close the front doors, hit a button to rotate the carousel, door opens again and then a new type of arm comes out and does stuff. That would blow my mind! Its something I'd hope to see if Steve Jobs joined the R2 builders and put some type of money thing going into this crazy droid project.

I probably won't be working on this R2 dome until the summer or fall. I collected lots of parts but need much more until I can put it all together. I have the 300 MM dome, dome base plate, front and rear logic parts from David Shaw. I need the radar eye and HPs as this is an aluminum build. It might be another year or so until I run into that.

For some odd reason I got back into collecting action figures again. I seem to do this in spurts here and there over the years. I have a decent astromech collection of around 43 of them and starting to collect various protocol droids.

I think I have another 200 figures in the closet in packages that were never opened.
You can't ever have enough storm troopers or droids.

Wednesday, December 22, 2010

300 MM Dome Arrives in time for Christmas

The 300 MM Dome arrives right in time for Christmas. Now my droid isn't just stuck as R5-D4. I can also one day have R2-D2 whenever I get this dome finished. I have some many parts in work. The rear skins are drying in what I hope is its final paint. When I'm waiting on paint to dry I relax and play guitar and retain what I'm learning from it. 

Once back on the droid, I'll mount the rear skins and focus on finishing how I'm going to do my rear door. After the rear and front skins are done I'll start messing around on this R2-D2 dome. Oh, ya in 3 weeks I'll be ordering another R2 dome in plastic so I'll have 2 dome builds nearly going at once! Plus I plan to cook up a plan to put that R4 head together in the next 60 days. I also have another frame coming in next month and will be building this Comm8A frame doing with a Comm8B droid for R2-Q5 in a short 4 month build. Crazy, yup~

The dome comes double boxed in double sided re-enforced cardboard. It also has holes predrilled for the rocker bearing ring along with the hardware to fasten it.

I was able to take the inner dome and HDPE ring right out of the box and take off my R5 head. It sat perfectly on top of my droid on the first time. How about that for excellent standards in an open source group of builders!!!

2010 has been one crazy year for me. I got the Star Wars bug again but this time solely on droids and spent most of my year collecting parts for a while. Then when I got a bunch of them my build started and split into multiple droids and robots and I think I'll be working on some type of robot for rest of my life now. There is always something fun to create.


Tuesday, December 14, 2010

Wrecked My Paint

I took all the clamps off and found I wrecked my paint. This time the little black clamps dug into the paint. They didn't do this to the front skin. Oh well I had planned to JB weld the crap out of this and repaint it anyway. Minor setback.
The VHB tape only works well enough to do basic skin bonding. You'll run into parts like this that need to be glued together.
 So I superglue it and then clamp for 20 minutes and move section to section until its all locked together.
This is what it looks like 15 minutes later after superglue. I so far used 3 bottles of this stuff on my droid so far.

Spot gluing various sections that need it. Then moving on to putting some JB weld on the some of the seems.

Monday, December 13, 2010

Imperial Parts and Skin Work

Right now I'm a R2 builder and a second droid parts collector. I started collecting parts a while ago and now started to amass a decent second set. So its time to get to work on my second build. My second frame should be here within 30 days so time to get some parts or skins painted black. These resin pieces will go into R2-Q5. I'd like to bring 2 droids to Phoenix Comicon 2011and Droidcon and that means I gotta work my ass off. Because these painted black pieces you see are the first parts on my second droid that has to be completed in 3 months and 1 week!
Black front coin return (left) by power and copper power coupler (center) with a freshly painted coupler (right), one of the shoulder buttons painted copper (top). This copper color is just the match I want but the paint itself is tricky to apply. The button above wasn't primed, but this copper is so light. I had to put on 6 coats! With the black power couplers only 2 coats of copper were needed. That was weird! I test painted other parts with copper and it covers black the fasted. This is good to know as I have a more parts to paint in the future. One day this droid will look like this. (image credit rebel scum)

One thing my mind is working on is a solution to installing these parts on the skins in methods other than superglue and JB weld as I'm currently doing. I'd like to see a velcro or bolt on/off or magnet solution. This way you could easily unfasten these parts, change them out with various colored parts and make a new droid. That's hard when its all JB welded to hell and back. The idea in a perfect high tech world solution is superglue with nano negatively charged magnets you put on 1 part. Then superglue with positively charged nano magnets on the other parts. They'd bond together with no visible means microscopically. That most likely won't turn up in a google search yet. But some type of standard like David Shaw has should evolve so we can do this with future parts.
Here is the type of paint I'm using. Ace brand black semi gloss. No opinion yet as its my first can.
 Krylon copper in the center. Works okay if you prime first or paint black. On the right is Rusteoleum white semi gloss. This is my 5th can! But I only used about 2 full can of those 5. It has a nice finish if you let it dry for two days. But out of 5 cans, 2 were DOA. Only 1 can I got to empty. The other 2 cans when they got half empty spitted out white blobs that wasn't cool on finish paint of expensive parts. I open new cans of white when putting on 'final' coats.

The results are really good with this white can but half of the cans are duds.
A lot of people ask how thick is that VHB tape? Well here it is applied on my rear skin. When you sandwich the skins together you won't notice it at all. Keep in mind this isn't super glue. Its tape. It's merely a good method to mend most of your skins together in a first step. You'll need some other adhesive to weld together other parts of the skin that share more of the load these skins will take.
Here we go again with the clamps. I'm clamping the inner and outer rear skin. The full rear door was cut out a couple of months ago. That part of the build wasn't any fun so I finished the front. Now I'm completing the rear section. Tomorrow I'll take off the clamps and spot superglue any weak spots with the clamps.


Here I'm just goofing around going for a clamp record. If you don't know what that is you haven't surfed Astromech enough. You don't need to put this many clamps on. But how many times in your life are you going to clamp together R2-D2's skin? Have some fun with your expensive robot!

Sunday, December 5, 2010

Sanding R5 Head Ring More

I did a couple of hours of work today. I added a db 25 cover to the end of the male slip ring. I was watching it spin from underneath barely clearing the Pittman motor. I figured I better cover those small solder wires incase the male part accidently hits something if it came apart.

I found these at Fry's Electronics for .79 in plastic as you see here. They also had them in aluminum for a couple of bucks but it weighed a lot more. I'm trying to keep the weight down so I went for plastic.
I never really finished the lower ring of the R5 head the way I had wanted it. I sanded it a lot back when working on it with an electric sander and 50 grit. But I can still see the spin rings in and it was bored and decided to take them out.You can see these spin rings on the left side of the photo. The right portion of the photo shows what happens when you use 120 grit on a mouse sander.
This photo shows a couple of imperfections that need to be sanded out. I guess I'm picky, at some point I'll go thru this a second time and make the ring look even better. You don't have much to work with on R5 so max out what you got.

I slowly sanded them all out with 120 grit. Then put 240 grit on the mouse and gave it another pass. After that it was hand sanding going from 320, 400, 600 grit paper. I even went to 1600 grit but got tired of sanding and said let's just polish this with Mothers.
 This is pretty close to how I want the silver ring to look. There are a few spots I needed to sand more with 600 and higher grits. Looks pretty good for just a few hours. When I get bored I'll pop the head off and put a few more hours in the spots I want to polish up better. I just use Mothers and a grinder with a buffing wheel I'm rigged up.

Right now the head weighs 19 pounds. You can still hear the motor groin when it spins. I need to somehow reduce weight. But where? I think one of the few things I could do is get rid of the upper plate that holds the pie panel pieces on. That might reduce 1 pound. But I'd end up adding servos and in the end adding more weight.

Friday, December 3, 2010

Skin Update and JEDI Custom Codes

I finally got off my butt and installed the aluminum power coupler. I've had this piece for a while. I was hoping to get a David Shaw bolt on piece. However I didn't want to wait what could be 1 - 2 years for a run so I went forward with what I could find. 
This is an old school one. I don't know who built it. Here is some of the parts painted Krider blue. I put a small curve into the main circle with my sander and a file.
I blue taped the white painted parts around this area. Then clamped in the round part and tweaked it until I like its final resting place. Then I put a bead of super glue around it on the back side. Then a healthy fingers worth of JB weld over that about 1 hour later. I let the skin sit for 24 hours until the JB weld dries almost completely. I'm happy with it.

I found out its going to be a few months until I can get the aluminum center vents so I decided to just mount my resin versions for a while and finish up the front skins. Soon I"ll put these aside for a few months or just mount them on the Comm8A frame. I plan to start hooking up servos to open the doors. But I have many more jobs infront of me that I'll probably get side tracked with.

I have the rear door to get back to and finish that up just like I did the front skins. That will keep me busy for atleast a month. By then the frame for the 2nd droid will be here and I can paint it black and start my 2nd build.

This just arrived today so now I'm up to 3 complete sets of aluminum skins.

Introducing droids skin #2 and #3. The nearly finished skin above is #1. This skin will serve as R2-D2 and R5-D4 and be servoed and pimped to the max. Droid #2 will be a black imperial droid that will be mounted to a CommB frame. The #3 skin will be painted red. If I use the skin snaps right all three skins will be interchangeable on both of my frames.

The other thing I got done today is messing around with programming my JEDI control system to understand more how it works. Today's lesson was writing my own custom JEDI strokes. If you have the JEDI installed and want to follow along try the following. 

///Near the bottom of your startup.txt file add this.
'Setup User defined J.E.D.I. stroke commands here

SET JEDI 1, 32  "music.txt"        'Assign JEDI stroke "32" on button 2 to play music box

'Play a startup sound to tell that this startup JawaScript file is finished
SET MP3 1 VOL 85
PLAY 1, "startsnd.mp3"

///Next create a text file called music.txt and put in your thumbdrive. Add the following code.

'music box
'Play a sound alerting people of effect
PLAY 1, "SONG1.MP3"        ‘Play the first mp3, name it explicitly here

///last step is put a song on the thumbdrive and make sure its named song1.mp3

You should be done now. Boot up your droid and do JEDI stroke of 32 and that should say song1 is playing. This is the start of using your droid to play other than Star Wars things and make it a multimedia player too. My next code lesson will be adding more songs or doing it randomly from a ton of them.


Monday, November 29, 2010

Slip Ring Soldering and Installation

I did a small parts buy of 50 of these slip rings a couple of months ago and sold them to club members. I'm not electronics expert and my soldering has be limited to things like speaker wire and car stereos. I never did boards like this and don't quite have the tools to do this right. However my friend Rich does! He's an electronics expert who rebuilds Porsche CPUs on the side. So he taught me some lessons.

Rich uses a CSI-STATION1A from Circuit Specialists Inc. Pretty good deal for $30 bucks. 
He decided to start off with the easy piece first the Slip Ring Connection Kit. 


This is a pretty straight forward deal and pretty simple. First read the manual get to know the job. Then add all the components you see here. Rich advised not to use a pointed tip and to use a flathead tip.Using 22 gauge solder you touch the solder tip to one side of the component and let it heat up for a few seconds. Then apply the solder on the side and let it melt and wrap around the little stub. Then solder each one methodically. After Rich finished one of these boards I did the other one. I took about 20 minutes or so per board. I have to admit it was a good lesson to get your feet wet if you never did this before.

Rich then checked out each solder for holes using a 25x jewelers glass. My HD camera's macro shot here does the same but shows dozens at a time. Where as his shows a single one of these contacts in full screen view.

Now is the harder portion of doing this.

With one hand you hold the wire it don't matter which one to the first DB 25 connector. With your other hand you move the soldering gun tip to the either side of the port. With your 3rd hand you add the solder after you allow a few seconds for the connector to heat up. You might need two people for this or a set of helping hands and a large magnifying glass is a must. 

We did a continuity check on each wire to make sure each one was the same on both db 25 connectors. Note there are two blue wires. Make sure you're sending the right signals through the proper wires. Then its plug and play after this. Also note on this Scott has determined that port 7 is not used. There are 24 wires in the slip ring and 25 possible contacts on these connectors. Thus 1 channel is not used.
 When your done it should look something like this. Now to install this in your droid you simply just very carefully put the bottom port of the slip ring there your frames center hole.

I decided that I wanted to mount the female board on my electronic drop down panel. But the slip ring wires aren't long for that so I need to order 1-2 feet DB 25 extension cable.

So I redid my electronic panel already. I mounted some of my boards side ways to try to utilize the space more. I had to move the JEDI control because last time it touched the Pitman motor as you can see the holes left over.

You end up using these 12 volt connections fast and I don't even have the feet motor controller wired yet. I need to go back and make sure what I do have hooked up is fused properly.

At last, I have now power to the top via the slip ring and confirmed on one channel I powered up in the body. Now I need to mount this board in the head.

Here is a look inside R5-D4's head! The slip ring connection kit receives 12 volt power from the body. It powers up that purple LED RC board that I control with a remote. There is plenty of room in this head left. In 2011 I plan to upgrade this R5 head and open all the panels with hinges and servos now I have the electronics in place to get started.

The back panel is now hooked up like this. LCD to read the JEDI feedback, voltmeter, memory card and Vex receiver with the vmusic2. This will change as I add more parts and reconfigure as I go.


Now my droid looks like this. 


Thursday, November 11, 2010

J.E.D.I. Control Installed

After a couple of days of wiring this up and testing it. I have installed most of Scotts J.E.D.I. Control system into my droid. Now my droid is getting out of the static category to actually doing something.

Pictured here is my electronics panel with a Rigrunner 4008H 
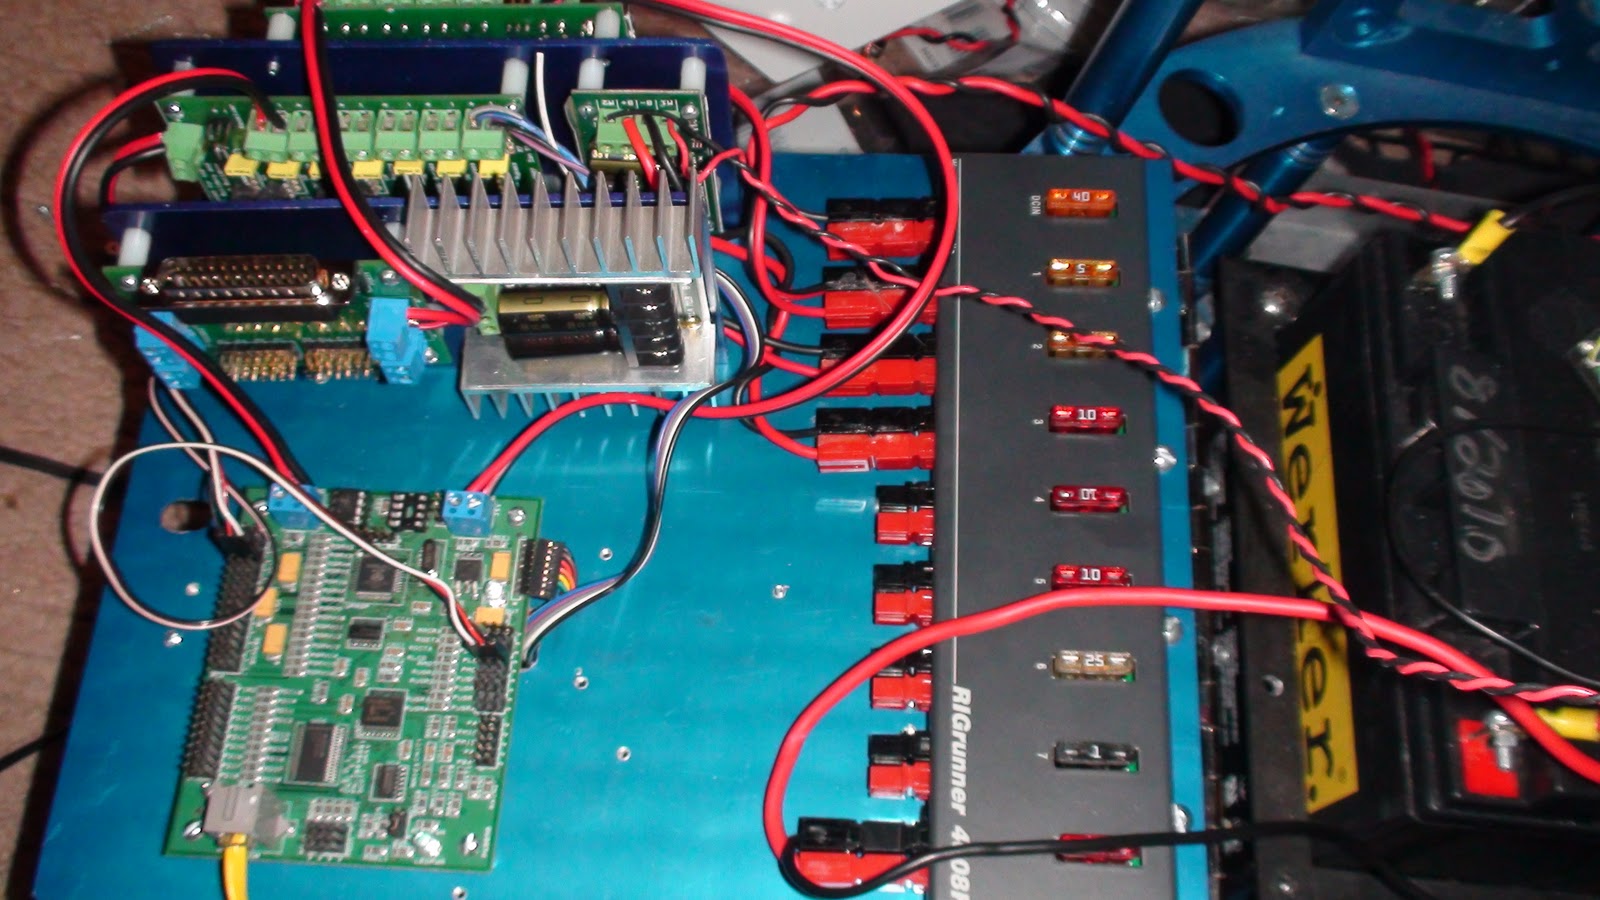
to the upper left is the 12v input from the on/off switch. Next to that 2 wires run down to Dan's Power distribution version 2.1 and 2.2 boards to convert 12v to 5v and feed into the J.E.D.I.Controller. In the center is the Syrene2x25 motor controller that a servo port feed controls the Pittman motor spinning the dome. The final power port is running to the 12v amp.

The two power distribution boards are temporary to get this up and running. When I get the DC/DC converters these probably won't be needed and I'll save twice as much space.
With the panel up I still have plenty of room, but limited space to put some more electronics. Now that most of the JEDI is mounted I kinda of look back on what I should have done. A few things I know I want on the back panel. 

1. Easy access to the SD memory card that runs the droid is a must have item. I plan to take this card out a lot and adjust the startup files, or writng my own routines and test them out.

2. The LCD that shows feedback on what the JEDI is reading from the droid wrangler. It would be cool to have the items with the most LED lights on the backside so it looks cooler when the door is off or open.

Oh snap!
I can't close my electronic panel! The Vex area on the J.E.D.I. controller is hitting the Pitman motor:( I only need about 3mm more and it would lock. I have no room left to move it so one of the power distribution boards will have to move and I'll change the wiring to make space. Damn, I  cut a hole in the back door to run the vmusic cables for nothing!

So I'm going to have to take this all apart, rewire it and move the JEDI board for sure atleast 1/2 inch inward. I find it sucks tapping 4-40 holes in aluminum so I need to order 4 more taps for all this AL work I foresee. I break them every 40 holes. There's already 1 broke 4-40 tap in this blue panel:) All the other sizes I've never broke one but these are so small eventually it snaps in the hole after some usage.

Well atleast now I have dome control I can rotate this noise thing left or right.!
Now with dome rotation it was and understatement to say it was cool to see it turn left and right from RC control. That was a new milestone passed since this project started nine months ago. I now have power over the sound, dome and servos and soon movement in a couple of months.

However none of this works perfectly and there's always some bugs to work out.

1. The I have to turn up the amp on full settings to here the vmusic sounds properly. The result is a loud buzz. This was be expected. I probably have to get another amp. This one is too big anyway. I'll check astromech and try out a different amp to resolve this.

2. The dome spins okay clockwise at sufficient speed. Spinning it counter clockwise its very loud and only 1/4 of the speed . This suggests some resistance. This was an issue before any of this electronics so I'll check out how level the dome is. It works okay without the R5 head on top of it.

3. I'm ordering some thinner wire and rewiring this all next week. I'll double up the power boards so they are ontop of each other. The JEDI Control board has to be on the inside panel. Because all the servo connections can't be reached if its on the other side. The power boards must also be on the same side as the Rigrunner and JEDI board. The motor controls can go on either side. I'm also thinking about putting this in the droid soon to give me control over 16 more servo/motor options.

Basically I'll wire this up probably for 12volt  from the Rigrunner. Then put it somewhere in the droid. Then I can trigger 'something' to happen. 
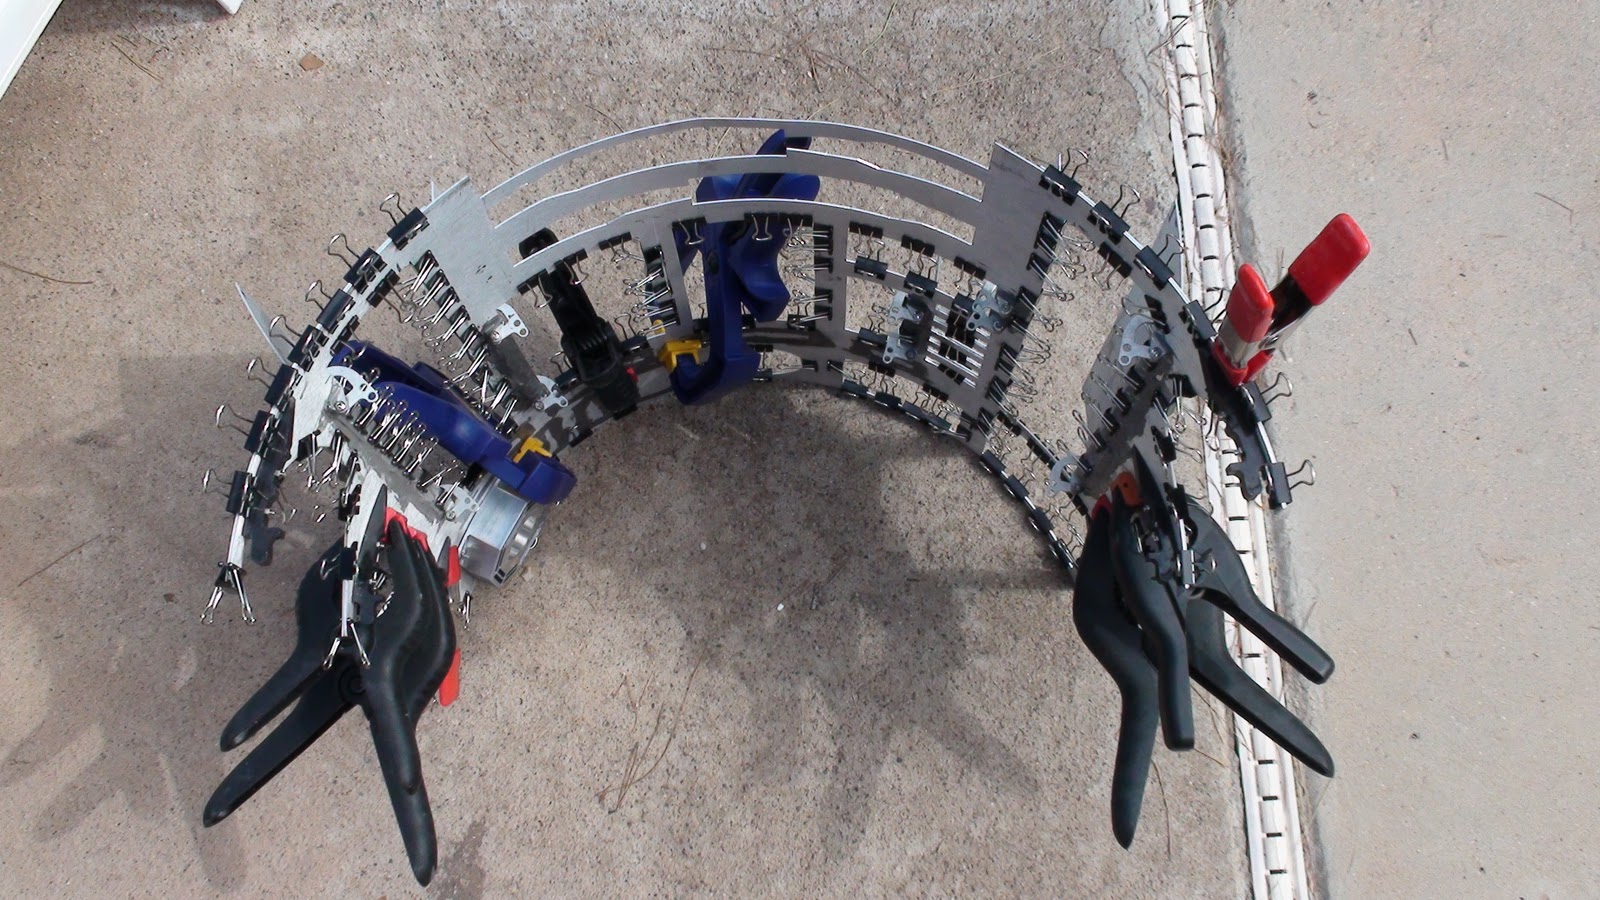
Four micro servos plugged in to test the system. So far so good! I need to figure out how to hook up servos from channel 7-16 and control them with the VEX remote. I hope my next update is how I figured out how to make these servos open and close some doors.
 

Thursday, November 4, 2010

Gluing the front inner and outer AL Skins

Okay, finally another update. I've been out of town and worked on a few things. I decided to focus on completing the front skins. I don't have all the parts I need like center vents or coin slots so I'm going for it anyway. I used the 3M(TM) VHB(TM) Adhesive Transfer Tape F9460PC Clear, 1/2 in x 60 yd 2.0 mil , 2 sided tape first.
Here is the tape all applied before I took off the back side. I let it sit for a day because I just copy what Paul does on his blog. :) It seems to bond better if you wait a while and press down a on the tape on your first surface its placed on. 

To make sure the inner and outer skins align. Make sure your coin slot is installed. That serves as an alignment key. After the tape comes up it seems to nearly wrap itself in place.

Now I have joined the two together using 144 mini clamps I bought from Office Max for $6 bucks. Its cheaper then buying a bunch of mini claps from Home Depot and does the same job. I don't know what the clamp record is for doing this job but I was certainly going for it. There's probably room for 200 clamps on the next one! Also note I glued the skins together with the doors on. I don't know why or if that is necessary but that's how I did mine.

My biggest mistake doing this entire process was using those tiny red clamps you only see one in this photo on the top right. However I later added 5-6 more of them later one and with no plate or masking to protect my painted skin. They are so strong they damaged the paint in every spot I used them. Now I have to mask and repaint and start over due to all the damage they did. The other clamps were okay but I guess I learned as I go.

Now the two skins are bonded. I started to superglue and use Goop to bond the five outer door skin panels. Here I'm doing the charging bay door. On some of my skins I used way too much JB weld but that sands down really fast with a dremel. My favorite clamps are the blue ones with yellow tips. You can squeeze them really, really tight. My second favorite is the black plastic orange tips. They clamp really tight but don't do damage to my parts. The other black handed red tip ones are pretty weak and it seems I have tons of them. Clamp wise, get half a dozen of the blue/yellow tipped clamps and some of the orange tipped ones.

Here is the front view. The superglue only takes about 20 minutes to dry and then you can move on to the next panel.

I have painted all the panels with the inner and out layers glued together. I sanded them and added more glue where needed. I got rid of excess JB weld. I also made a bunch more Coin Returns. There seems to be enough left over aluminum from these skins to make three to four complete sets out of. I made so many Coin Returns I pretty much have the cuts memorized now.


Now I have the utility doors area glued in and filed down. I had paint damage from the clamps and sanded that down. Notice the brown JB weld around the utility doors.

Builders, notice the grey color thats on the inner and outer skins. I used very, very thin coats of JB weld, and sanded and repeated this two more times until I had it to how I wanted. So its just about time to mask and paint and put the doors on. I want to install the J.E.D.I . Control next week and have this project donish.

 Now I have it taped up and ready for another coat of paint. It took maybe 20 minutes to put on the blue tape and finish it. 

And now the wait is over. The skins are finished being taped together, then spot super glued all over and then JB welding certain spots of both skins together and finally repainted.

The paint job is done, on Sunday it will be done drying in the sun. Then I can glue in the coin return and side pocket vent. Mount this to the frame and start planning on how I"m going to put servos on these doors. I also need to get the center vents and power coupler on the skins to finish it. Oh yeah, I need to get that coin slot done too. So many projects so little time.

For all the new people who just got in on the current run of the John Sherrell aluminum skins I hope this little blog helped map out your build. I also suggest checking out Pauls blog and Victor Francos blog on how they tackles the aluminum skins.Now the fun begins in this journey with the servos next.