I can't believe its been about 3 years since I did lots of updates. But here's more work I've been doing. This center foot took me about 1 month to do from start (have all the parts) to painted and completed.
It don't really take that long to assemble this foot. But it was 4 years ago that
I constructed my other foot on R5-D4 and the center foot shell was manufactured different and I simply forgot how the hell this thing is assembled. So I looked up past center foot build and that gave me most of my answers I needed.
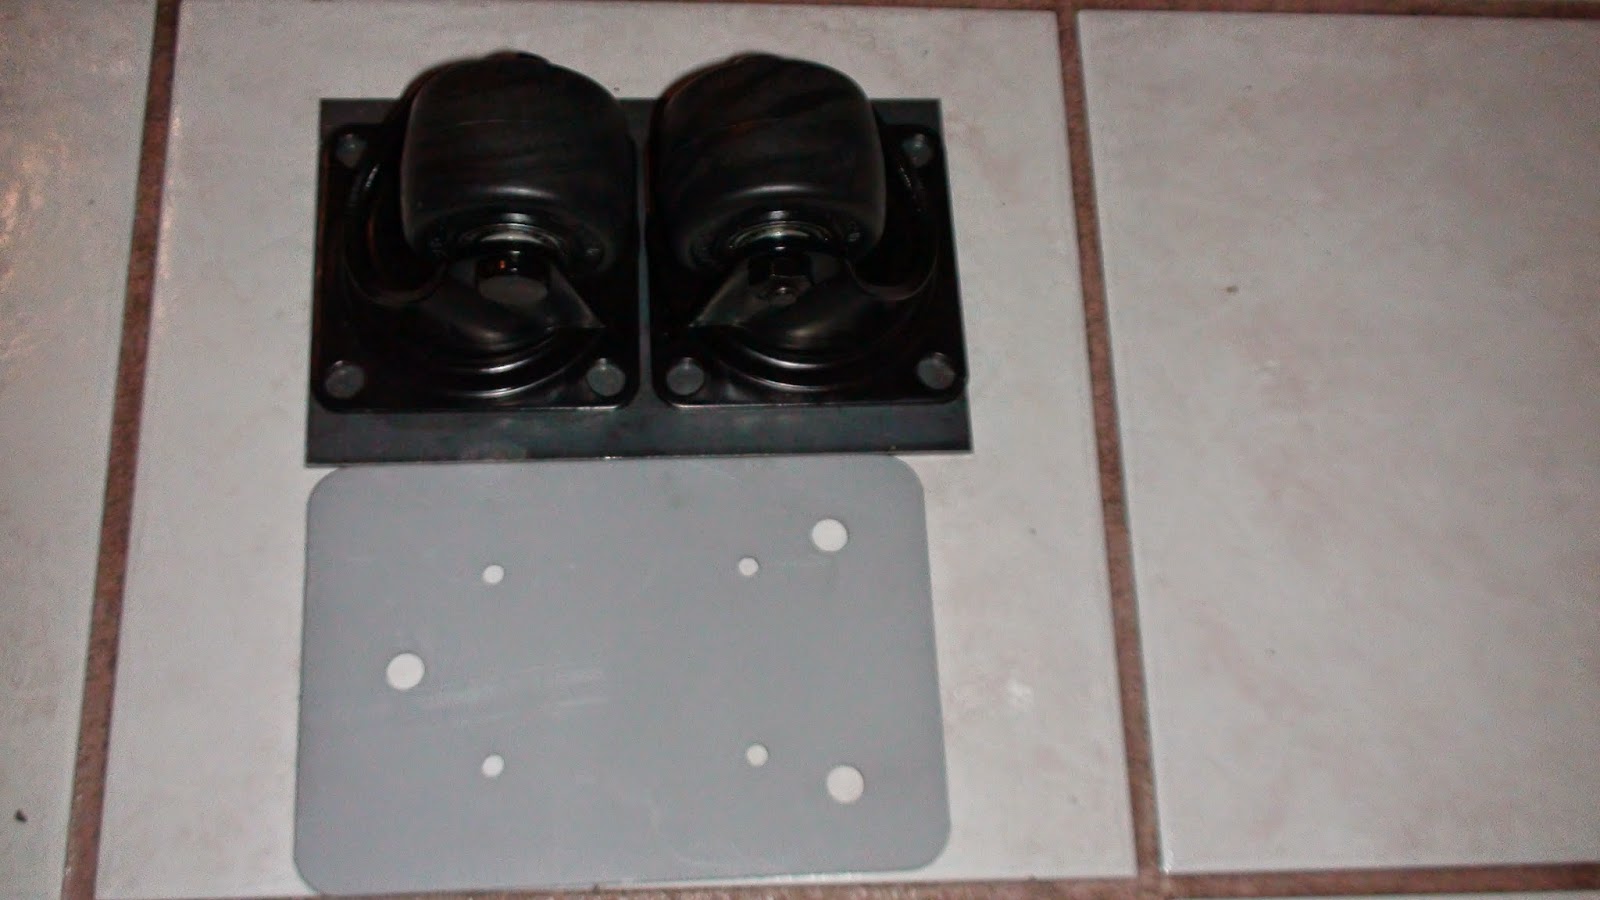
Pictured here are two heavy duty Misumi casters. These casters cost around $60-75 each! and they weigh a ton. The two casters are sitting on a steel plate that is not yet primed. Below the steel plate is a primered steel plate with rounded corners and has 3 large and 4 holes already drilled into it. This was the old standard hardware that came with the JAG foot system he created. That worked just fine for certain types of casters but these expensive monster Misumi casters need a long steel plate. So I went to
Online Metals and orders a steel plat that is .125 by 5x8 inches as shown above. The cost was $4.40 and $6 bucks to ship.
The center foot I painted black and then fastened the footstrips on bolts and lock washers. I used some Glazing Putty to cover the holes int the foot strips. I also drilled 3 holes into the foot channel to attach to the U shaped hardware. I realized I only needed 2 holes so I bondod the center hole and repaired it and reapainted it black. For this type of build everything has to be assembled in order or it's a bigger pain in the ass than it already is.

Next up I got the 2 steel plates ready. The U shaped steel plate on the left had many holes already drilled in it. I taped 4 holes for what I think was 10-20 screws. Then I screwed on the 4 spaces you see in the U channel plate. Next to that plate on the right is the steel plate I ordered from Online Metals. I placed the casters on that plate and used an automatic punch to mark where I wanted to drill and tap what I need. So I taped 8 holes 1/4 inch if memory is right and screwed in 8 bolts. Then I drilled and counter sunk 4 holes that will be used to attach this steel plate to the U channel plate. I used a bit of blue Loctite but if you also do a build like I have, it should never come apart. Also after I tapped all the holes I needed I cleaned out all the junk from tappng and then primed the steel. Remember to do this or it will rust.

For illustration of how this works I put the top plate on the U channel so you can see how this will go together inside the footshell. Also note the 8 bolts are a bit to long and I ended up using a dremel to cut the bolt in half to make it easier to put locknuts on later.

Now for the actual foot construction. This was for me hands down THE hardest part of this center foot build. As I said you need to assemble this in order or its too much work trying to assemble nearly 20 pounds of steel and aluminum. So you start this by mounting the center ankle cylinders to the center ankle. What you see above is the only method I was able to do to attach it to the ankle. I don't remember how I did this on R5 as that was 4 years ago and I don't remember what burger I ate yesterday. So at first you will simply try to bolt these on using allen bolts or hex bolts. The problem is the area you have to try to get your fingers down in is too small. My fat fingers pretty much take up the entire area. I tried to find a person with very tiny fingers to try to get the allen bolts on and it didn't work.
So above is my solution. I went to Ace Hardware and bought a threaded rod that is 10-20 by 2 inches long. Then I screwed the bolt into the cylinder as seen above and dremeled off the bolt until it just has enuff meat for a locknut to fit on. So now the bold easily go into the center ankle and instead you need some tiny fingers to get some locknuts started. Then finish fastening them with a wrench. I don't know how other builders pulled this off, but that's how I did it.
So after both cylinders are on the center ankle you are free to attach the center ankle to the center footshell. That part is pretty easy so no photos needed.
Now with center foot and ankle attached I bolted on the U channel with the 4 stand offs as seen above. After you finish that get the 2 half moons and outer foot plate and attach it to the 4 predrilled holes you see in the U channel. You have to do this now because after you install the 5x8 steel plate you won't have access to this areas anymore.
Next install the 4 bolts that fasten the bottom steel plate to the U channel. I got 1 of my holes a bit off but it all holds together extremely snugg and well build.
Next drop in the 2 casters and put on 8 locknuts and it's about ready to mount on your droid! Notice that these awesome casters do not touch or bind together when at their closest. There is also no need to remove material from the footshell like many others did in the past with casters that have a wide swivel range.
Here she is. R2-Q5's center foot ready for action. This thing is H E A V Y. Weighing in at 18.4 pounds.


No comments:
Post a Comment