
Here is the tape all applied before I took off the back side. I let it sit for a day because I just copy what Paul does on his blog. :) It seems to bond better if you wait a while and press down a on the tape on your first surface its placed on.
To make sure the inner and outer skins align. Make sure your coin slot is installed. That serves as an alignment key. After the tape comes up it seems to nearly wrap itself in place.

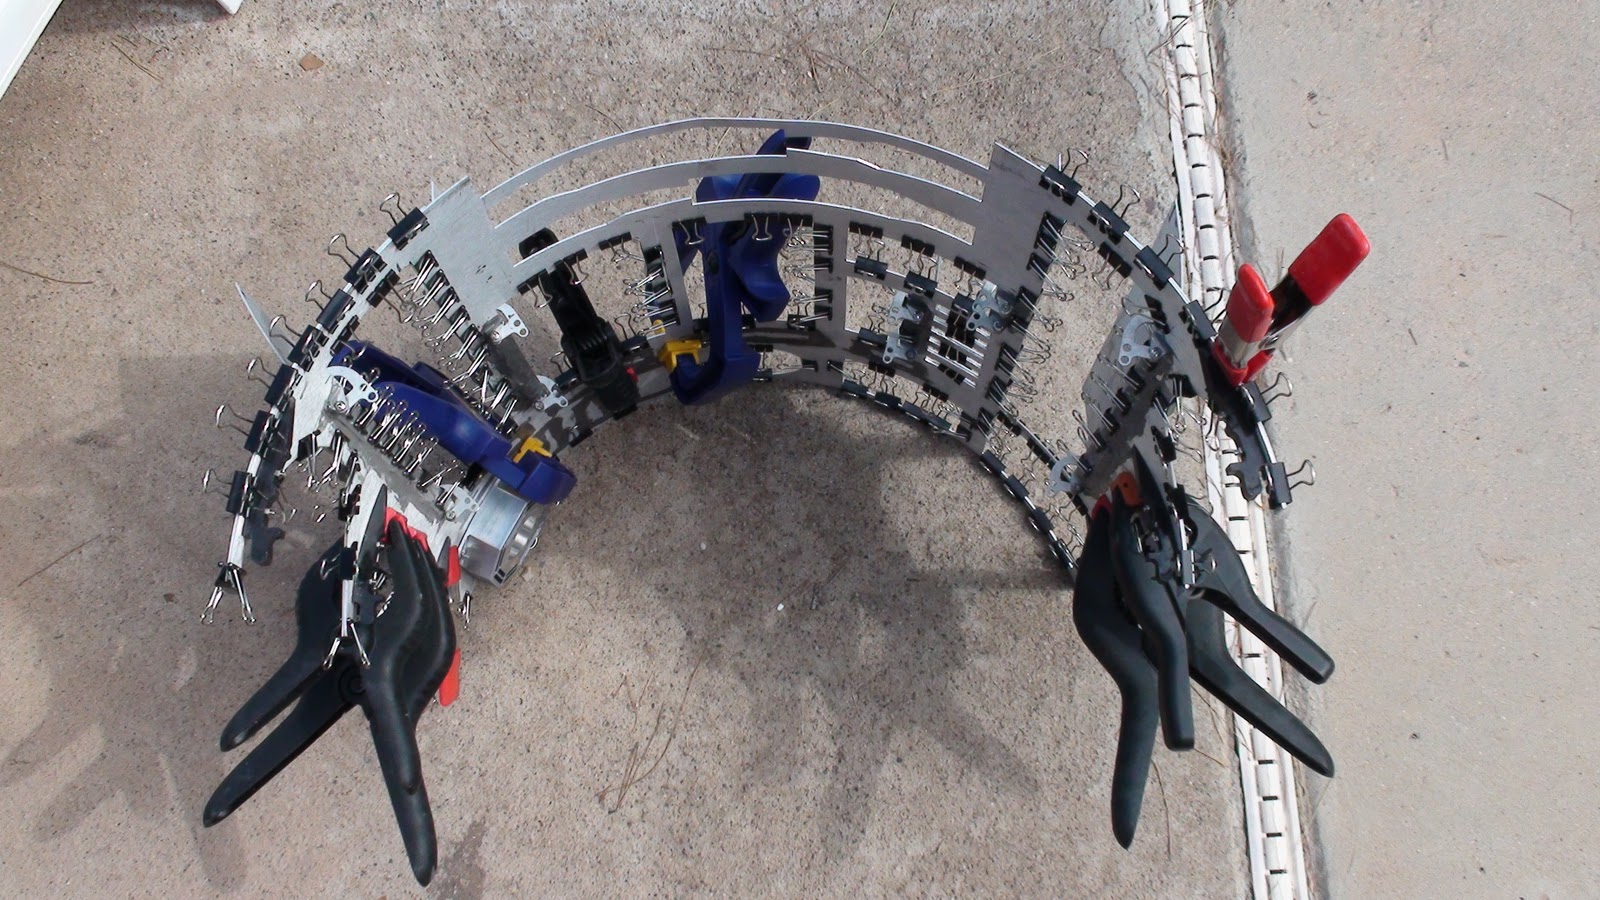
Now I have joined the two together using 144 mini clamps I bought from Office Max for $6 bucks. Its cheaper then buying a bunch of mini claps from Home Depot and does the same job. I don't know what the clamp record is for doing this job but I was certainly going for it. There's probably room for 200 clamps on the next one! Also note I glued the skins together with the doors on. I don't know why or if that is necessary but that's how I did mine.

Now the two skins are bonded. I started to superglue and use Goop to bond the five outer door skin panels. Here I'm doing the charging bay door. On some of my skins I used way too much JB weld but that sands down really fast with a dremel. My favorite clamps are the blue ones with yellow tips. You can squeeze them really, really tight. My second favorite is the black plastic orange tips. They clamp really tight but don't do damage to my parts. The other black handed red tip ones are pretty weak and it seems I have tons of them. Clamp wise, get half a dozen of the blue/yellow tipped clamps and some of the orange tipped ones.

Here is the front view. The superglue only takes about 20 minutes to dry and then you can move on to the next panel.

I have painted all the panels with the inner and out layers glued together. I sanded them and added more glue where needed. I got rid of excess JB weld. I also made a bunch more Coin Returns. There seems to be enough left over aluminum from these skins to make three to four complete sets out of. I made so many Coin Returns I pretty much have the cuts memorized now.

Now I have the utility doors area glued in and filed down. I had paint damage from the clamps and sanded that down. Notice the brown JB weld around the utility doors.

Builders, notice the grey color thats on the inner and outer skins. I used very, very thin coats of JB weld, and sanded and repeated this two more times until I had it to how I wanted. So its just about time to mask and paint and put the doors on. I want to install the J.E.D.I . Control next week and have this project donish.

Now I have it taped up and ready for another coat of paint. It took maybe 20 minutes to put on the blue tape and finish it.
And now the wait is over. The skins are finished being taped together, then spot super glued all over and then JB welding certain spots of both skins together and finally repainted.

The paint job is done, on Sunday it will be done drying in the sun. Then I can glue in the coin return and side pocket vent. Mount this to the frame and start planning on how I"m going to put servos on these doors. I also need to get the center vents and power coupler on the skins to finish it. Oh yeah, I need to get that coin slot done too. So many projects so little time.

For all the new people who just got in on the current run of the John Sherrell aluminum skins I hope this little blog helped map out your build. I also suggest checking out Pauls blog and Victor Francos blog on how they tackles the aluminum skins.Now the fun begins in this journey with the servos next.
Nice work! Isn't that tape fun to work with once you get the hang of it?
ReplyDeleteI dunno how I'd put these together without the tape. JB weld would be very messing. Too much area to cover and it sets up kinda of quick the way I mix it 50/50.
ReplyDeleteI have 2 more sets of skins coming and will keep using these tape and super glue to bond them. Thanks for hte idea.