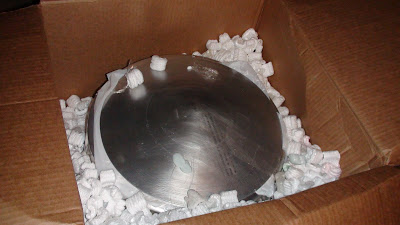
Here is the head of R5 as this story started. This is a JAG AL spun dome.
Well temp mounted that looks kinda of cool. But those lines in it from the spinning need to be erased. That can be done with a electric sander with 50 grit sand paper. 50 grit chews into metal like this pretty nicely.
After more research on droids I learned that COMM8 who made my frame also makes on R5 greeblies that fit this JAG R5 head. Pictured are neck ladder, party tape, eyes,antenna and other awesome stuff!
The level of detail that builders put into that machined parts is simply astonishing. They usually aren't cheap but the quality level is top notch to say the least.
Now after a while I did more research and contacted JAG about his plans for where you install all this stuff. So you need to start measuring your droids head and careful making all the lines. You can't screw this up and redo it. Take your time. Don't do this in one day if its your first time.
For a week or two I was conflicted on what size to make these panels. The layout in the top photo is like the toy in the previous photo. The layout below is the one from the JAG drawings.
I have gathered my astromech army. After pondering for a while I decided I wasn't happy with neither of them. I went back to the source and watched Star Wars.
This is the spacing I'm looking for. Not thin like the top photo or as wide as the JAG. So I split the difference, or in otherwords. I eyeballed it the gaps to aligned them with my gut, which happens to be 1.1/8 spacing on the outside between the 8 red/orange panels..
So there is what I cut out for the pie panels. I think I got close and did right by the original R5-D4. I also cut out the side coffin holes or whatever they're called. Everything is counter sinked and let the bondo begin soon!


No comments:
Post a Comment