First off the good.

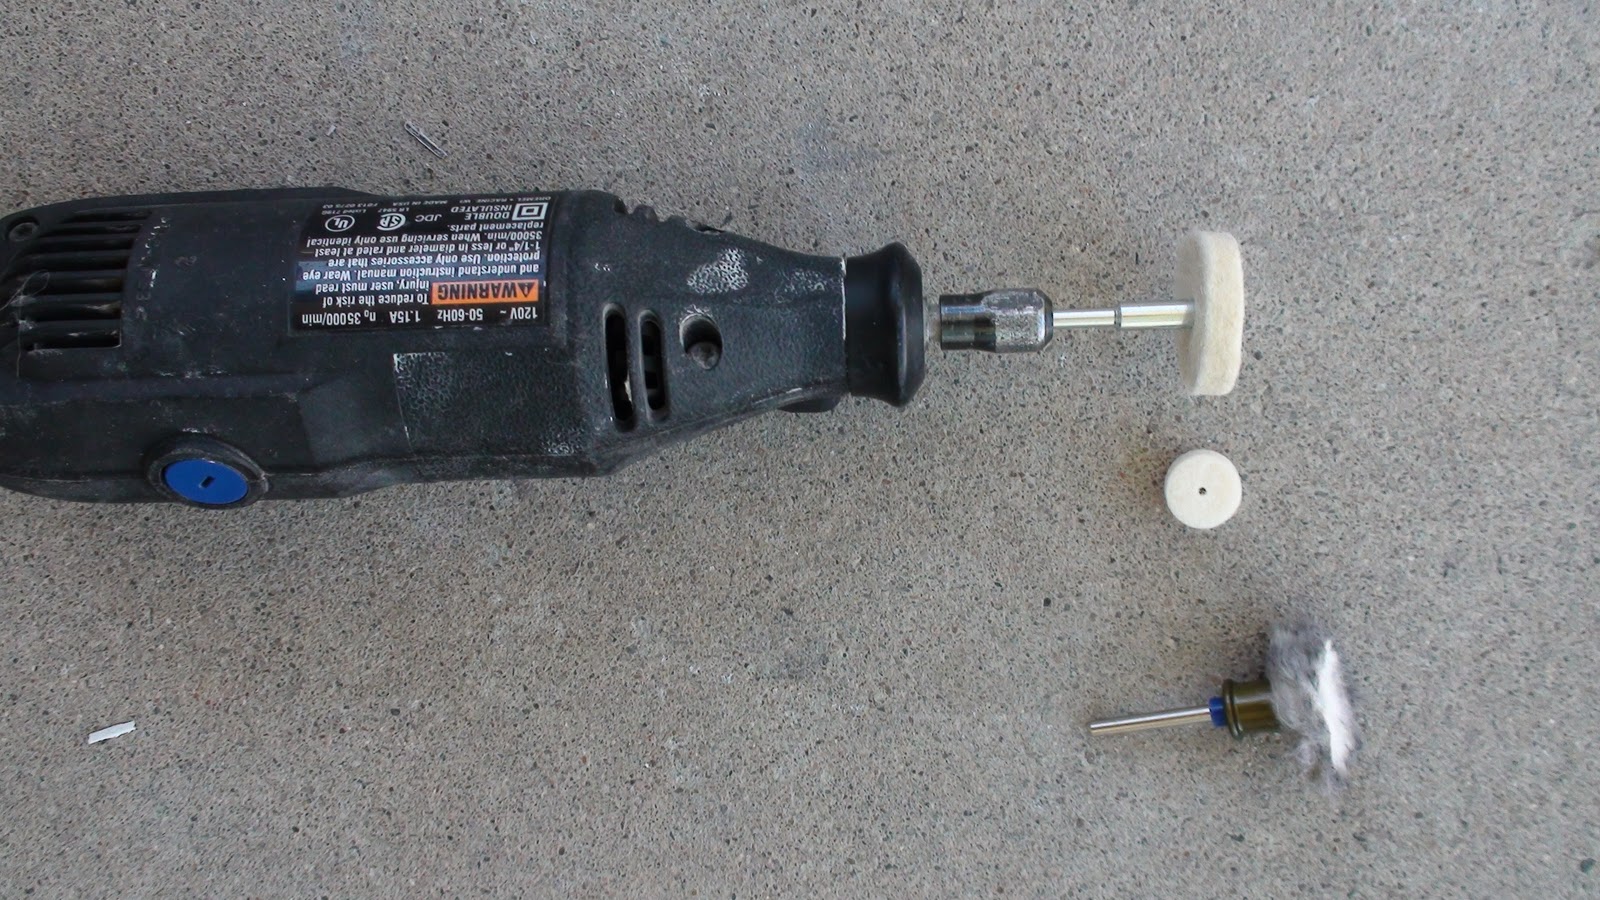
I'm polishing using the disc that's attached to the Dremel. Don't bother using the 2 pictured below it. They're expensive and will be chewed up at a higher rate. You'll get more mileage out of the one I'm using. You'll probably need 4-6 of them per Rockler depending on your experience doing this. Also don't do this all in one shot. Let your Dremel cool down. I'd suggest polishing 1/4 of the ring and let the Dremel cool down.

That new adhesive I bought didn't work. I didn't even have to install it and try, just touching it was clear that wasn't going to hold. So I ripped off the strips and started to think. I noticed my rear doors had the JB weld cracking. Too much wear and tear on them. I have purchased 2 Xlarge hinges so I figured what the heck. I'm going to have to take this JB weld off to hinge them.
WARNING: The following images might hurt a fellow droid builders eyes. This is your last chance to close down the blog.

This is something I never thought I'd be doing or taking pictures of. Stabbing my skins with butter knifes. Oh my what have I stooped down to now?
Sometimes I think that his blog is not some instruction manual on how to build droids. Its an instruction manual on what not to do. But seriously I have been thinking about doing this for around a month or more. However I thought I could get away with just using some adhesive for those strips. I decided to take all the rear skins apart and add somethings I didn't know that I'd need to have. More on that in the next couple of blogs.
But it gets worse. Just before this prior to this photo, this happened.

I was using a sanding wheel on the end of this Dremel to eat away the JB weld. The wheel slipped off the skins at one point and hit the shirt under the skins. In microseconds the shirt binded up the Dremel stopping it cold in its tracks. Then what seemed like 'bullet time' kicked in. I knew that if I didn't unplug the power to this Dremel fast 'magic smoke' would come out of it, and/or burn down the house next. First I reached for the Dremels off switch and for some reason I fat fingered it and failed. Then I just grabbed the power cord and yanked it out of the wall to kill the power.
Too late, smoke was coming out of the Dremels vents. I thought there went 60 bucks, then put it aside and went back to polishing with my other Dremel. The Dremel took maybe a 2 second hit of motor being seized. Then like an idiot, 10 minutes later I said 'That cooled down, I'll use this Dremel to remove the rest of the JB Weld'. Then powered it up for 5 minutes and removed the rest of the JB weld. After I turned it off I noticed a nasty smell I couldn't tell if that was the smell of burnt JB weld or burnt up Dremel. Either way more 'magic smoke' was coming out of the Dremel. I'm going to put it away for a while so it can 'heal'. Maybe it nearly shot, or maybe I can buy some new bushings and repair it.

Now the rear skins are apart and I'm back to where I was a few months ago. However now I know what works and more importantly what don't work. Four months ago I wasn't aware of unknown unknowns that I now know what some of those unknowns are now known now but unknown back then. Now I'll attach the 2 magnets directly onto the inner skin. I'll also mount that strip with screws so it won't come off. The never ending rear door never ends.
So I might of wiped out one of my beloved Dremels but atleast I didn't bleed as much blood as yesterday.
If you have to take your skins apart don't bother sanding the tape or adhesive you used. You can but it won't do that much. I sprayed 2 layers of Goofoff and then use a razor blade and it peeled off like butter. Then I washed it with soap and water and its ready for me to do crazy things to on Thursday and crazy things will be done.

Dans power distribution board version 2.1. I have two of these in R5-D4 and this one will go in R2-Q5 to feed him power. Photo for reference. 12 volt comes in on the left of the board. Then next to it is 5 v, 9v, 9v, 12v, 12v, 12v.

Here is the back side of it. Not too many points to solder. I think I could put these together in around 30 minutes or so. The 3 open slots you see I believe are on default 12 volt. If you add I think a resistor you can step it down to lower voltage.
No comments:
Post a Comment